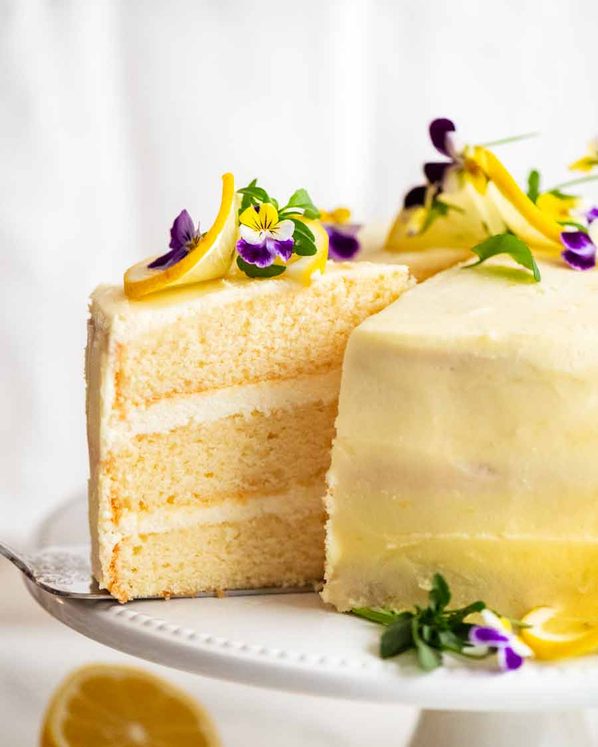
This is the Lemon Cake you make when you want to impress. 3 cake layers based on my signature Vanilla Cake recipe that readers around the world have fallen in love with, with a magic fluffy not-too-sweet lemon frosting. The bonus here is that this cake stays perfectly fresh for 4 whole days. That’s unheard of!
Pressed for time? Make this quick Lemon Cake with Lemon Glaze.
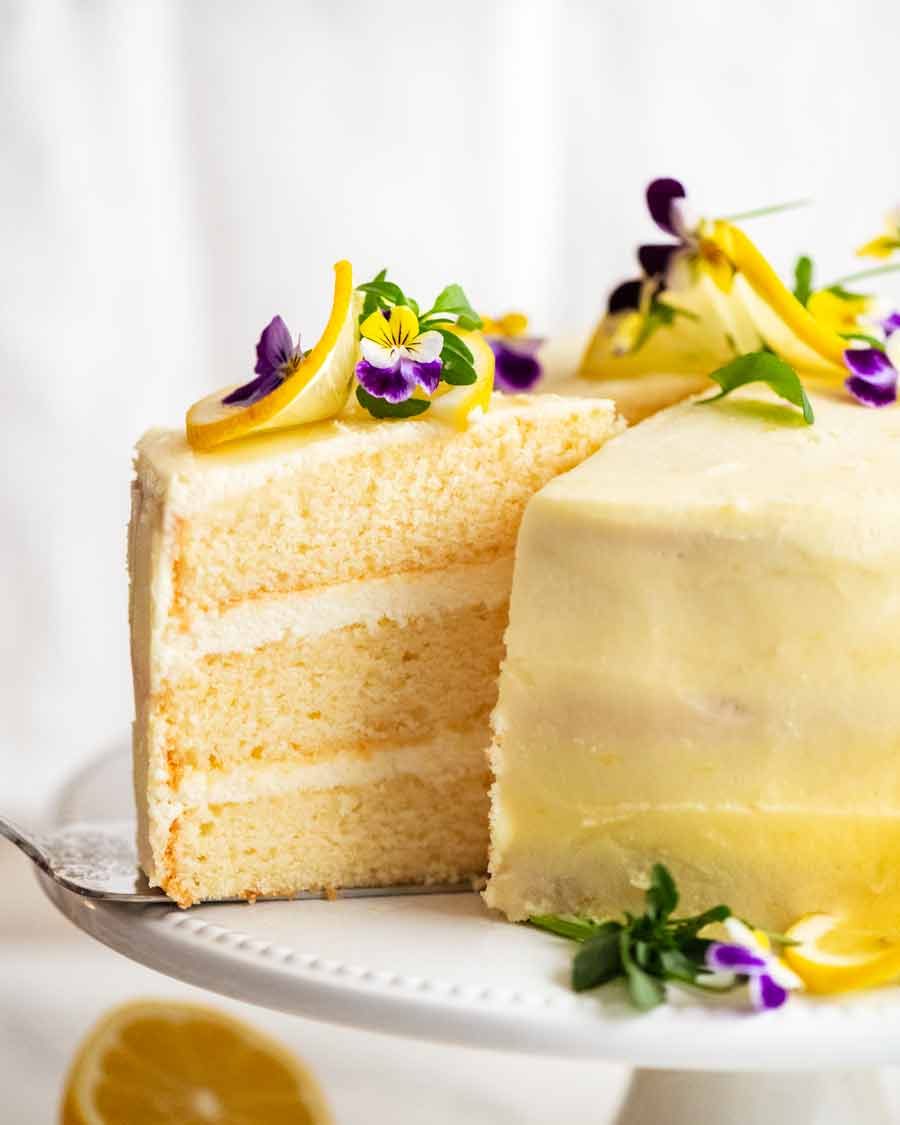
Quick look: Lemon Cake with Fluffy Lemon Frosting
-
Lemon sponge cake with 2 or 3 layers – Based on this Vanilla Cake batter which is one of the all-time most popular recipes on this website. It has an elegant, tender patisserie-style crumb that stays fresh for 4 days. Made with fresh lemon juice and zest.
-
Not–too-sweet Lemon Frosting – Based on this frosting, which has gained a huge following, this lemon frosting is fluffy, 100% smooth, but not cloying because it’s far less sweet and rich than buttercream. The texture sits between buttercream and whipped cream, but more towards the lightness of whipped cream. It behaves just like buttercream, ie. spread, pipe, fill cakes. More information here: My Secret Less-Sweet Fluffy Vanilla Frosting.
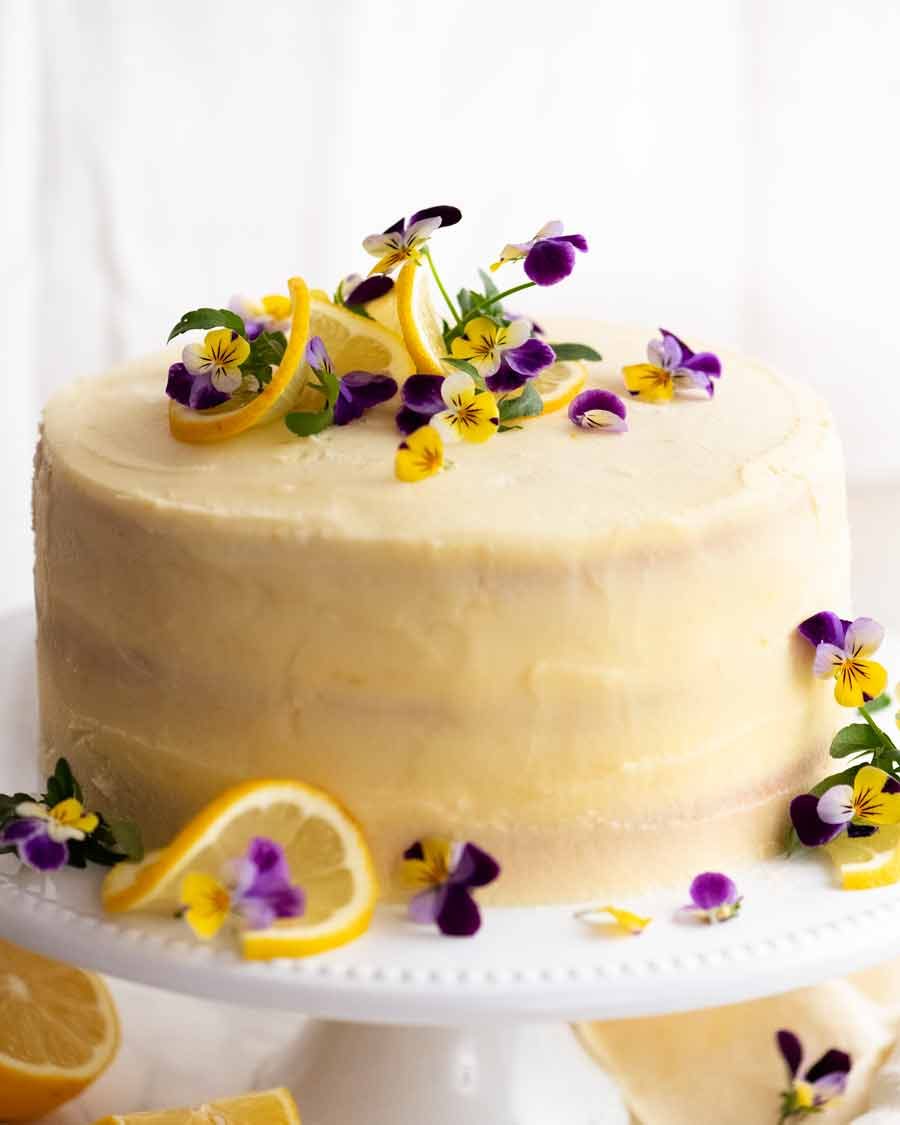
Lemon Cake
This is a three-layer Lemon Cake with a beautifully tender crumb that’s adapted from my Vanilla Cake batter. The Vanilla Cake batter is one of my master recipes that I adapt to all sorts of cakes. It could be blueberry-studded ones, a pink, real strawberry cake (in the works!) or even a layered chestnut cream Mont Blanc Cake.
The sponge is unique because it’s made using a French-Japanese cake-making method that relies on whipped eggs more than baking powder to lift the cake. This yields a much more elegant, softer crumb than typical Western cakes which often start with a “cream butter and sugar” instruction.
Here’s a comparison of the Vanilla Cake Crumb vs a typical butter cake:
-
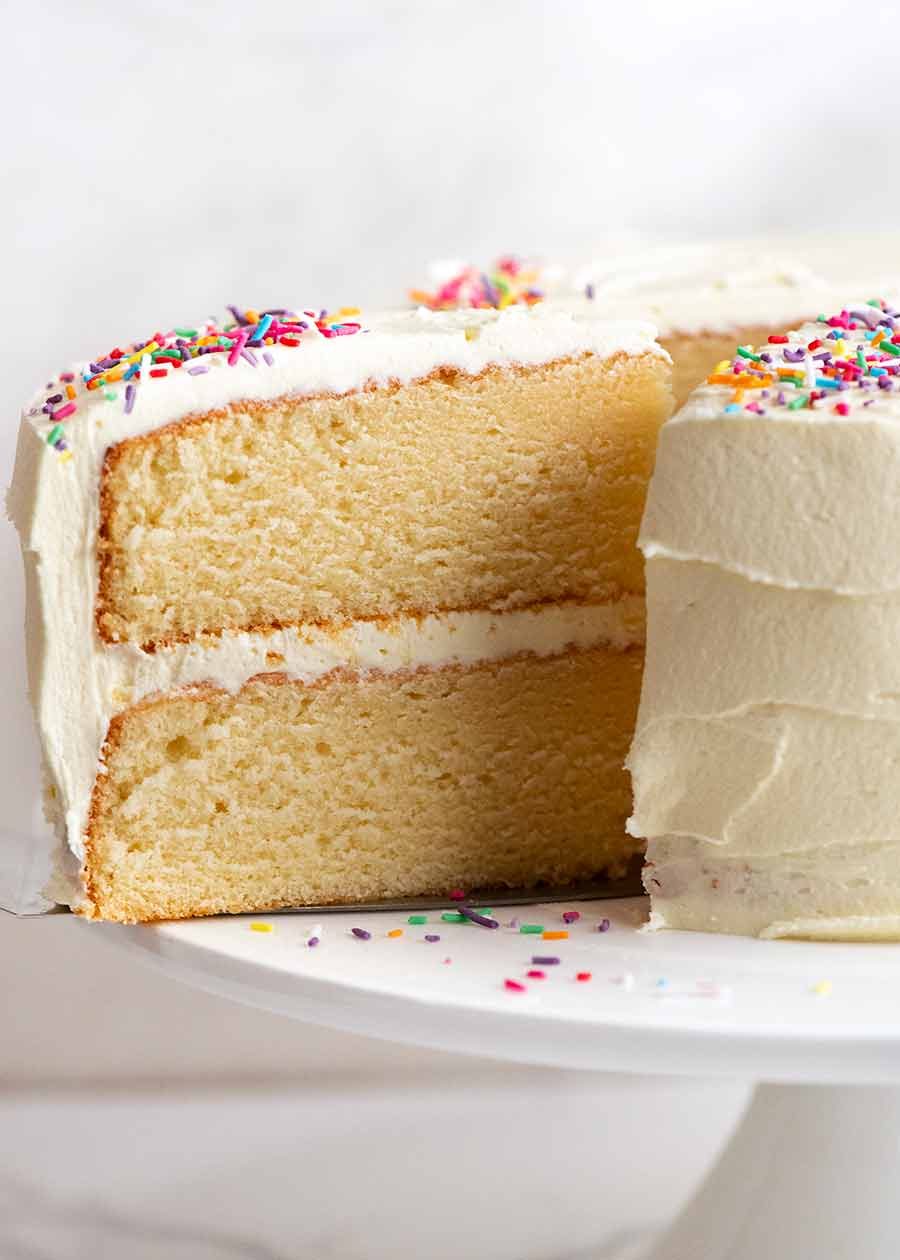
My Vanilla Cake recipe used for this Lemon Cake has a much finer, softer, more tender crumb than typical Western butter cakes -
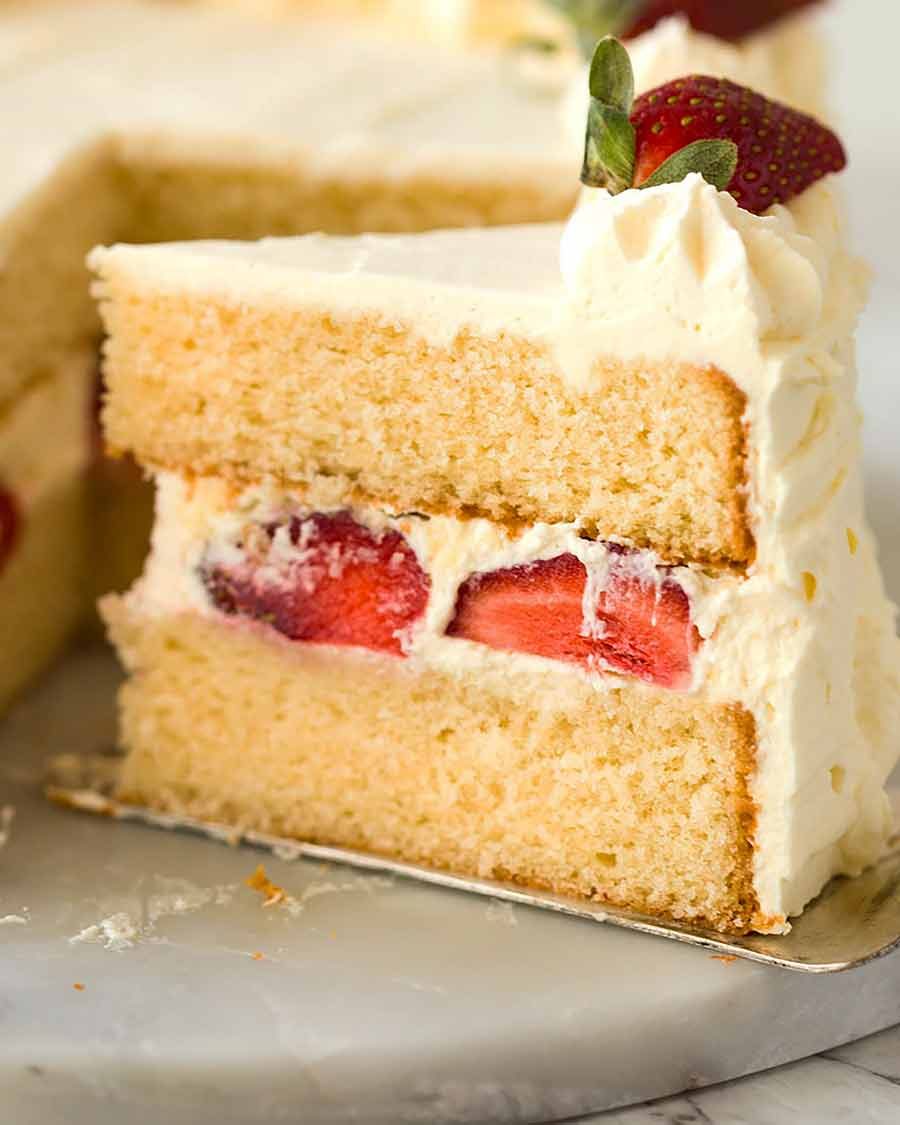
Typical butter cake. The crumb is coarser and loses freshness faster.
As mentioned, this makes is an excellent general-purpose foundation for so many other cakes. Like this Lemon Cake! Here’s a little behind the scenes Instagram video from when I was experimenting:
So, this recipe was actually the outcome of cake sample number 3 you see in the above video! After keeping it to myself for a few months, I decided it was time to share!
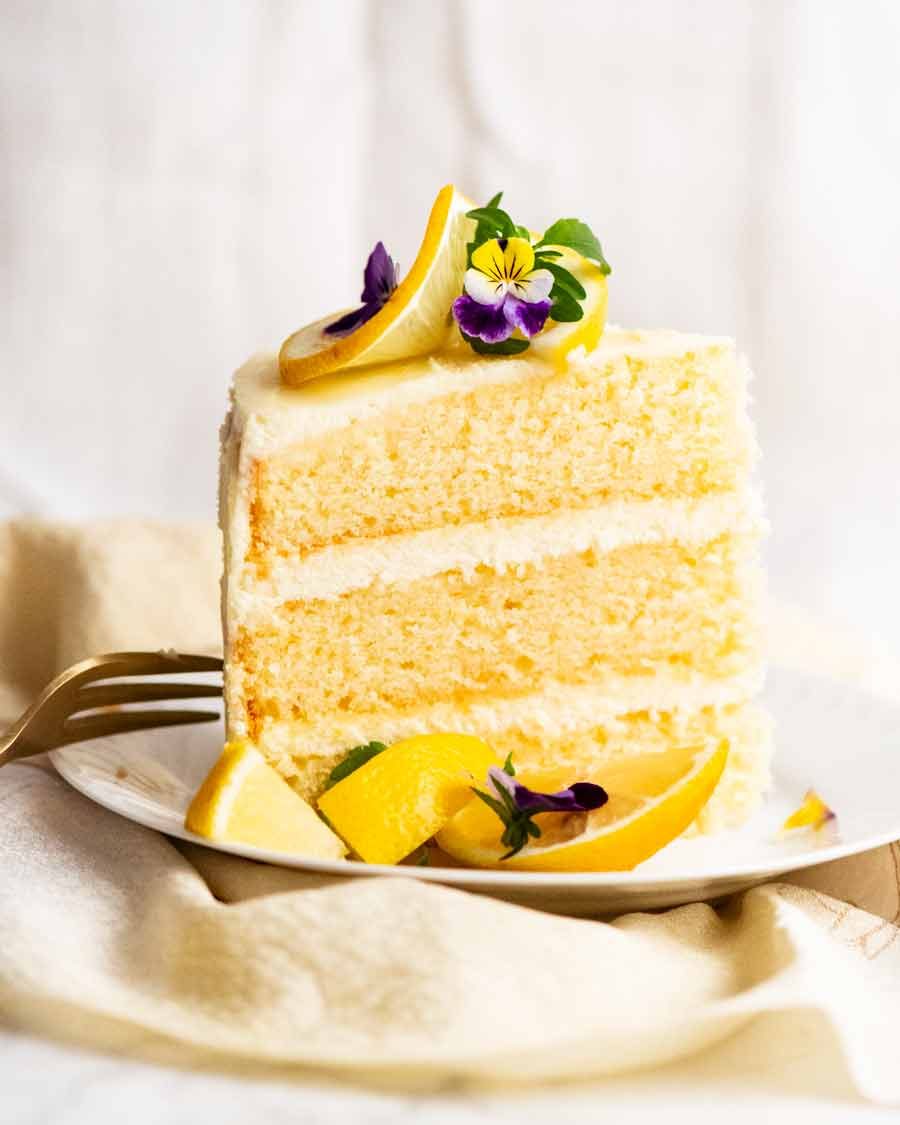
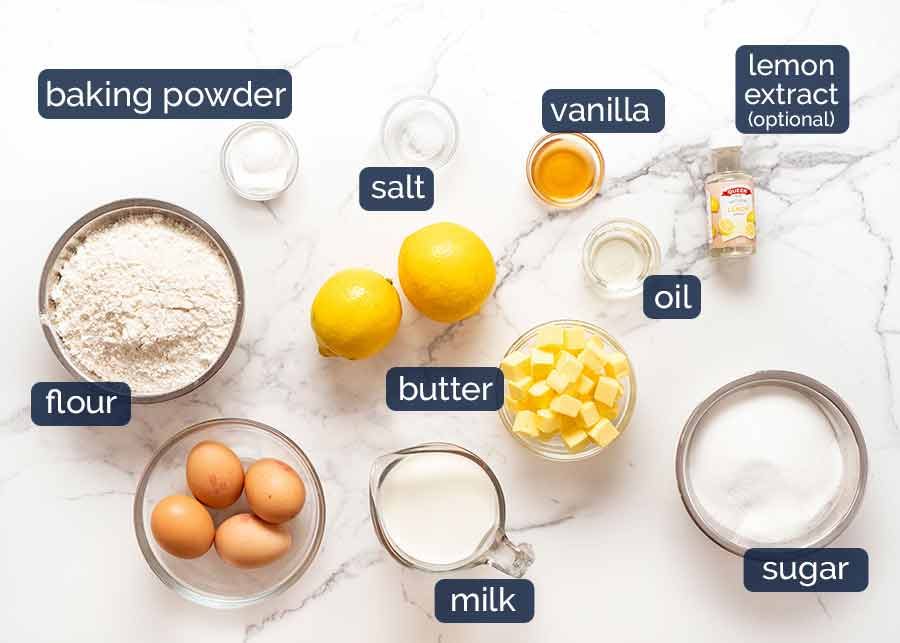
Ingredients in Lemon Cake
Here are the ingredients required for the signature, soft and fluffy Lemon Cake Layers! The Vanilla Cake post on which this batter is based already has additional detail about some of the ingredients, which I won’t repeat in full here.
-
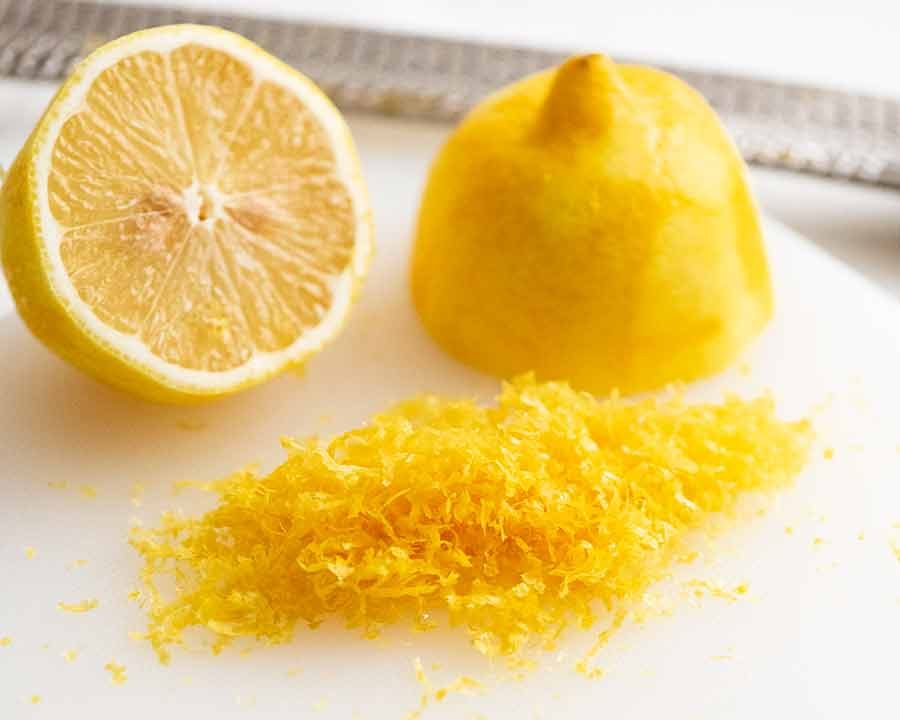
Lemon zest and juice – Powers the lemon flavour! Most of the lemon flavour comes from the zest, while the tartness comes from the juice.
-
Natural lemon extract (oil), OPTIONAL – Made from lemons, this is a concentrated oil that gives this cake a little extra lemon flavour leg-up. No matter how much fresh lemon you put in a cake batter, I find you can never achieve the quite same flavour intensity you can with just a a small amount of lemon extract (we just use 1/4 teaspoon).
It comes in little bottles like food colouring, found in the same baking section of stores. However, if you don’t want to get a bottle especially for this cake, I do get that. So just skip it – I promise this cake still has sufficient lemon flavour!
-
Flour – Just plain/all-purpose flour works better here than cake flour. However, if you can only get cake flour, that works just fine. The only difference is that the cake surface becomes a bit tacky the next day (not really a big deal in this frosted cake);
-
Sugar – Superfine / caster sugar is best as it dissolves more readily. But ordinary granulated white sugar is fine too. Please do not attempt to substitute with brown sugar or any sugar substitutes;
-
Butter – Unsalted, the default for baking;
-
Eggs – Fresher is better, and at room temperature. Fresh eggs fluff better, and room temperature eggs fluff faster than fridge-cold eggs. If you don’t know how, here’s how to check how fresh your eggs are;
-
Milk, full-fat – Just plain old cow’s milk! Low-fat does work too but rises marginally less. Do not substitute with non-dairy milk or buttermilk;
-
Baking powder – For lifting power. If you don’t use yours regularly, make sure sure it’s still good. Inactive baking powder is a common hidden culprit of cake fails;
-
Vanilla – For its beautiful flavour which complements the lemon so well;
-
Salt – Just a little brings out the flavours of everything else in the cake; and
-
Oil – For a touch of extra moisture but more importantly, it keeps the cake fresh for 5 days. Any neutral oil works fine here – vegetable, canola, peanut etc.
How to make Lemon Cake
The batter for this cake is based on my Vanilla Cake. There, I’ve already provided comprehensive process steps as well as the “why” in the method. Rather than repeating it all, I’ll focus on the essentials relevant to this particular cake.

-
Beat eggs and sugar for 7 minutes until tripled in volume. This is the secret to the beautifully light, plush texture of the cake!

-
Add dry ingredients – Whisk the dry cake ingredients in a bowl (ie. flour, baking powder, salt). Add the dry Ingredients in 3 batches to whipped egg mix, mixing on Speed 1 for 5 seconds after each addition. Stop as soon as most of the flour is mixed in.

-
Hot milk mixture – Whisk hot milk, melted butter, oil, lemon juice, lemon zest and lemon oil in your now-empty flour bowl. You will see little lumps which is the zest.
Lighten the hot milk mixture – Add some of the egg batter into the hot milk mixture. The purpose of this step is to lighten the hot milk mixture before combining it with the batter so it is incorporated more easily. The batter is beautifully aerated and this technique thus helps preserve all those air bubbles we created in Step 1.

-
Mix on low speed until just-combined. We don’t want to knock out all those air bubbles we created, remember!

-
Cake pans – Divide the batter between the cake pans, then smooth the surface.
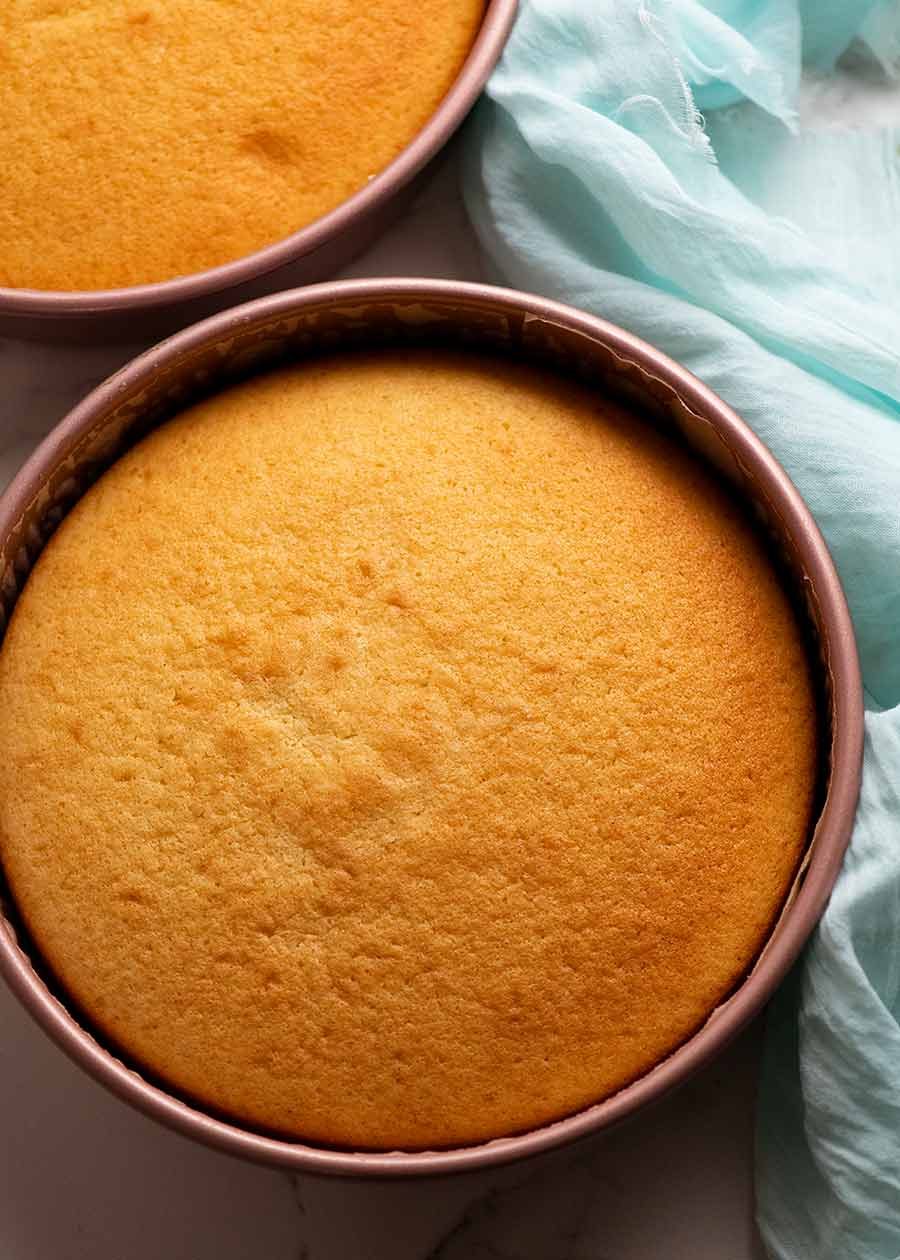
Bake for 23 minutes. If they don’t all fit on one shelf, put 2 on the middle shelf and one on the shelf below. Take the top 2 from the oven at 23 minutes, then move the bottom one up a shelf and bake for a further 2 minutes.
Let the cakes stand for a few minutes in the pan then cool upside down on a rack. Why upside down? Because the weight will will flatten out any slight doming on the upper surface so there’s no need to trim to make the cakes level.
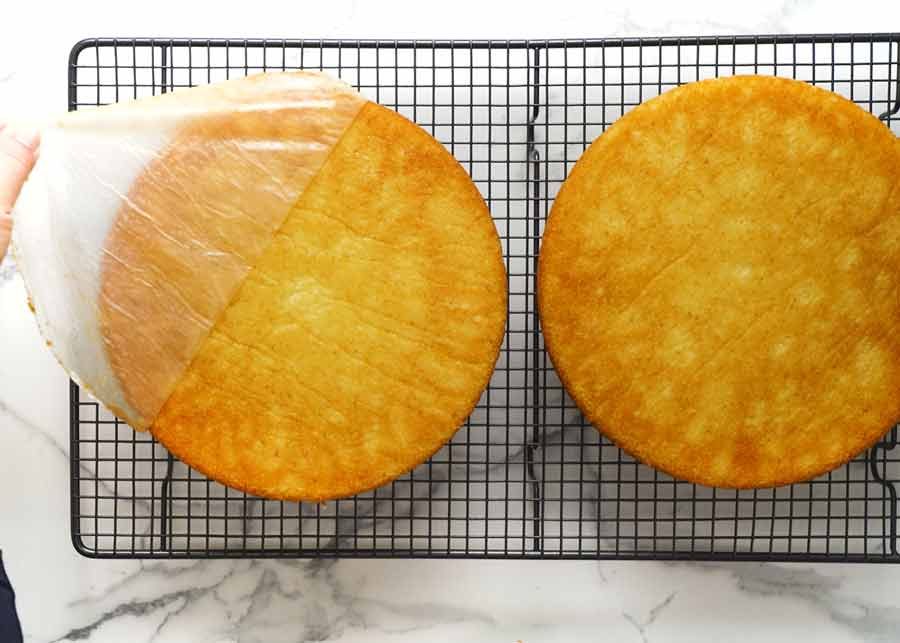
You’ll know straight away when you touch the cake that it’s a very special cake because you can feel how plush and velvety it is even on the surface.
Be sure to let it cool fully before frosting, otherwise it will melt your frosting!
How to make my secret Less-Sweet Fluffy Lemon Frosting
Ah, that magic fluffy frosting that’s 100% smooth yet not cloying and overly-sweet like buttercream! This frosting uses a flour-based roux as the thickener which is whipped up with icing sugar / powdered sugar and butter.
It’s gained a bit of a cult following for good reason. 🙂 For this cake, we’re making a lemon-flavoured version of the recipe.
-
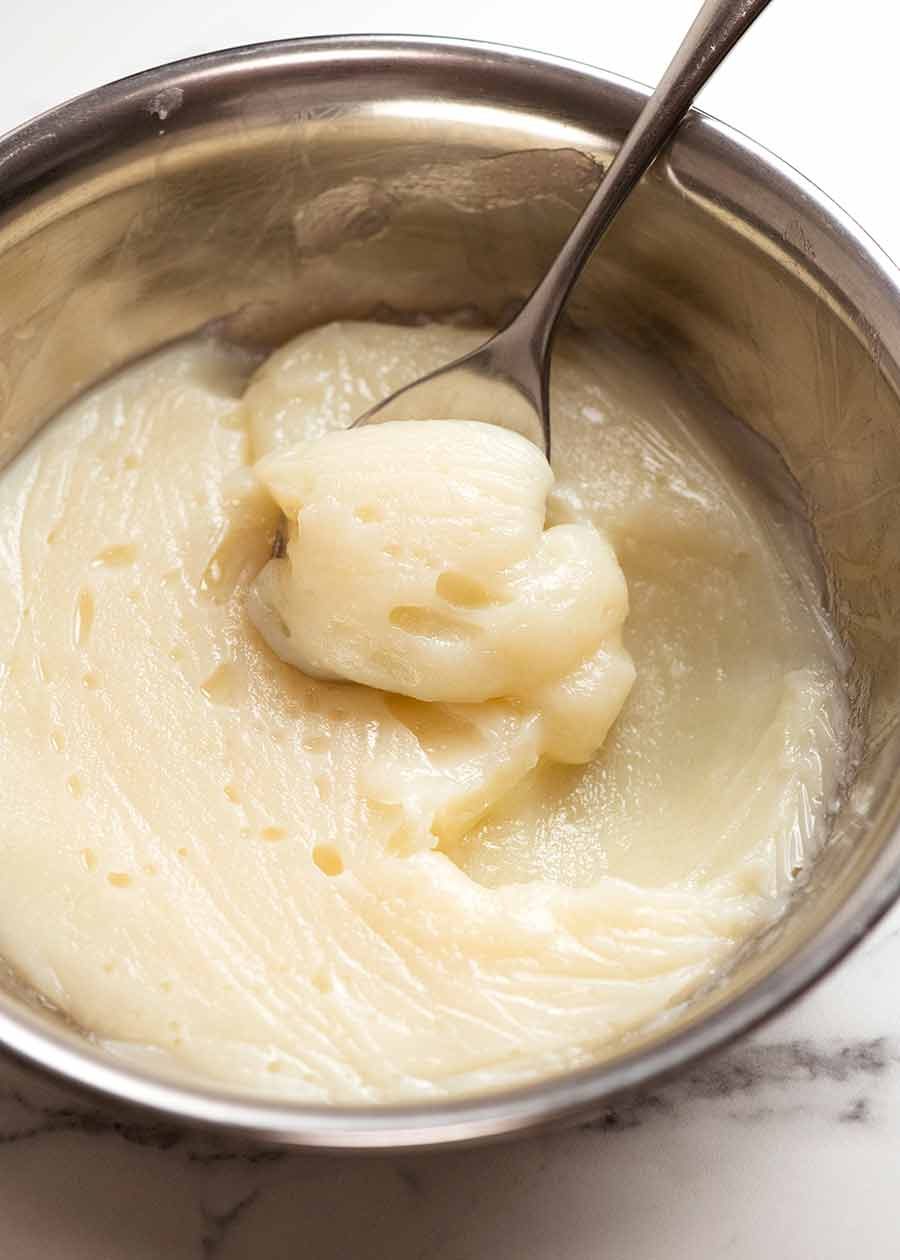
The unappetising looking flour roux that thickens the frosting -
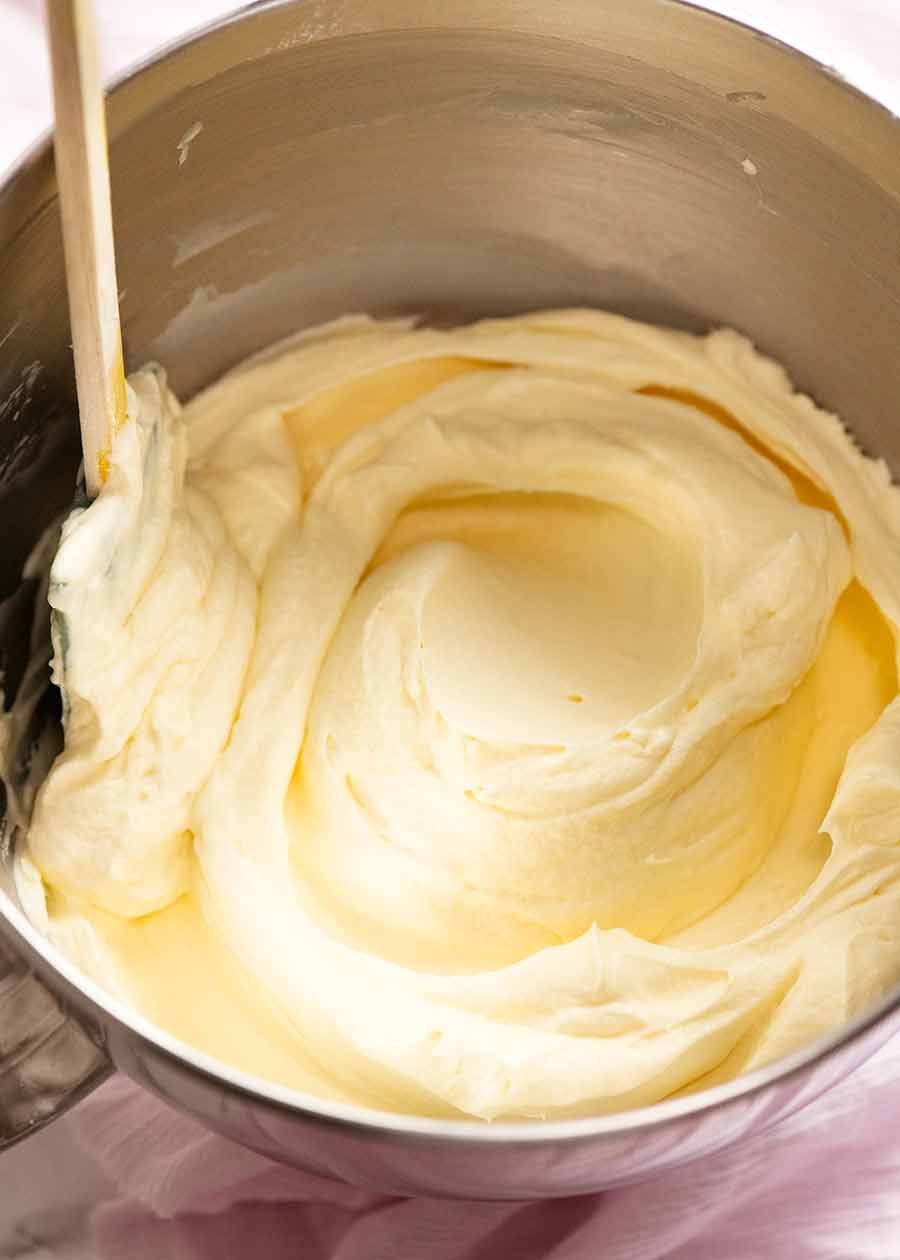
The magic fluffy frosting thickened with the roux!
Lemon Frosting ingredients
All you need is butter, milk, sugar, salt, lemon and … flour. “Flour??”, I hear you cry. YES. That is what thickens this into a frosting texture and gives it its trademark light and fluffy mouthfeel. It’s a vintage frosting technique from the days before cream cheese frosting was ever a thing. The actual name is “Ermine Frosting” or “Boiled Milk Frosting” – read more about it here in the original recipe.
I promise you will not detect even the faintest bit of flour once finished – not in texture and certainly not taste.
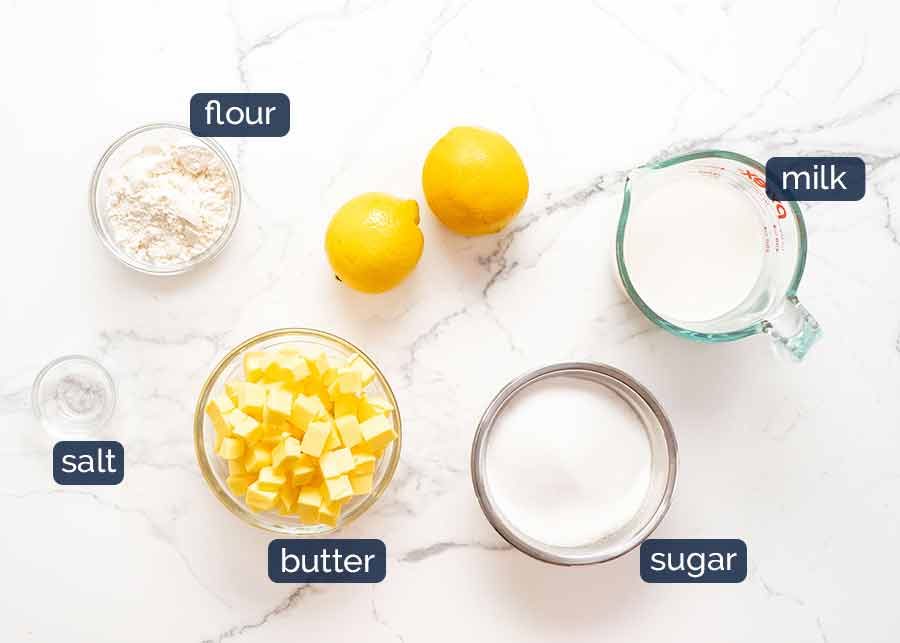
Why salt? As with the cake, just a little brings out the flavours of everything else in the frosting. You won’t taste it!
How to make this Magic Fluffy Lemon Frosting
First, we make the roux. It’s just like how we start creamy-sauce savoury foods like Mac and Cheese, only it’s sweet and we take it much further until it’s very thick.
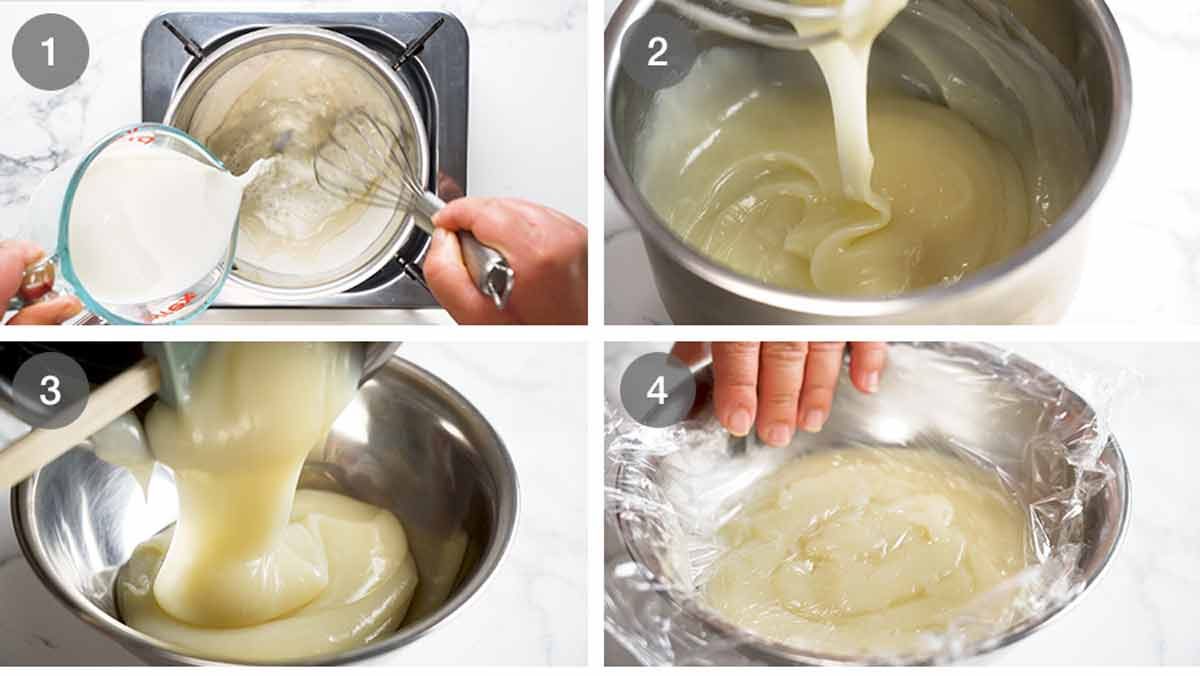
1. Thickening roux for frosting
-
Milk, sugar, flour – Stir the sugar and flour in a dry saucepan over medium heat – this just toasts the sugar lightly to bring out some flavour. Then slowly pour the warm milk in as you whisk (this avoids lumps).
-
Cook over medium heat until it thickens in a thick, dolloping-texture custard. The range of thickness possible is actually quite broad – I’ve made it way thicker and it still worked perfectly. In fact, the frosting holds its structure longer, and it pipes with sharper, more defined edges even though it is just as fluffy. Just don’t take it off when it’s still watery.
-
Scrape roux into a bowl.
-
Cover roux with cling wrap, pressing onto the surface to prevent a skin from forming (or use paper if you’re plastic-conscious). Now, and very importantly, allow to fully cool otherwise it will melt the butter. It will become like a thick, pasty, thoroughly unappetising jelly. At this stage you may start doubting me. Have faith and remember this is a real, age-old frosting technique – I did not just wake up yesterday and make it up! 😂
Cooling the roux / making ahead – I usually cool on the counter for 20 minutes then refrigerate for 30 minutes or so to speed things up. Don’t let it get fridge-cold because otherwise it won’t mix together well with the room temp butter (because the temperatures are too different). You can also leave it overnight in the fridge but take it out about 1 hour prior to de-chill it and bring to room temperature.
Now, we whip it up like any other frosting.
2. Whip frosting
-
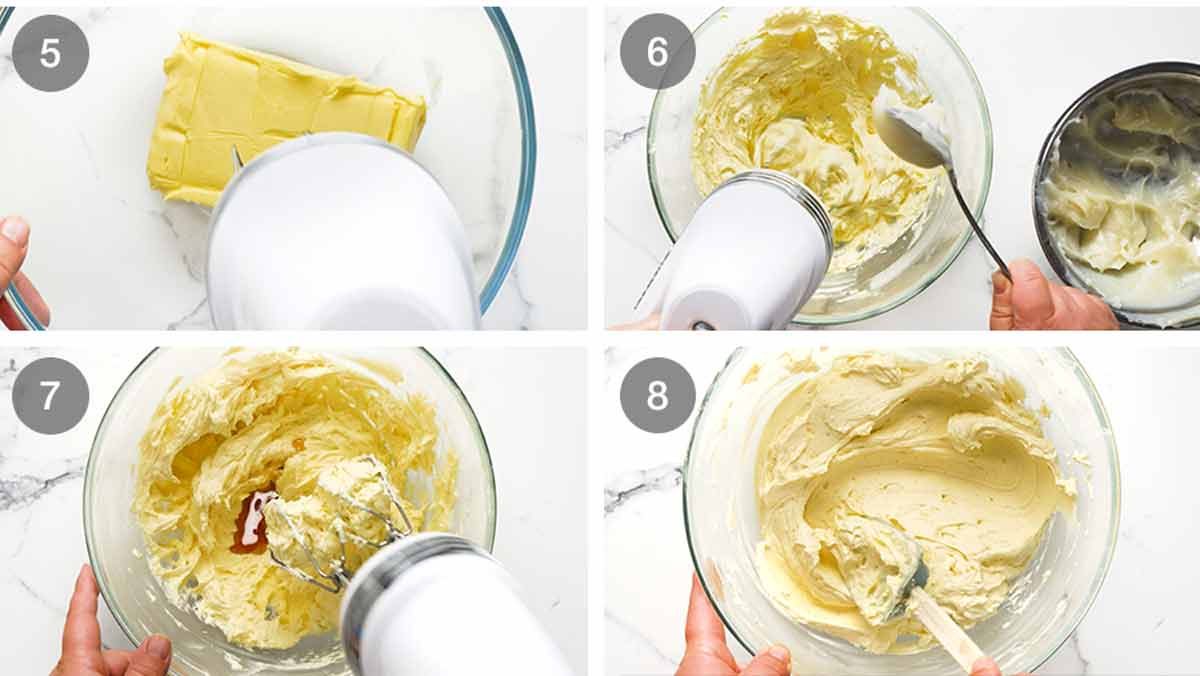
Beat butter until creamy – just for a couple of minutes. We don’t need it to become aerated because we will be whipping the combined mixture like you do whipped cream. At that stage it will fluff up more.
-
Add dollops of the roux in, beating as you go. Take 1 minute or so to add all the roux in batches, this will ensure your frosting stays smooth.
-
Beat, beat, beat – Add the lemon zest, juice and a pinch of salt, then beat for another 2 to 3 minutes, just like you’re whipping up a big bowl of cream. Only beat until it’s got a whipped cream consistency. Once it does, stop beating. Do not beat more than 4 minutes because this may activate the starch in the flour and make the frosting undesirably sticky.
-
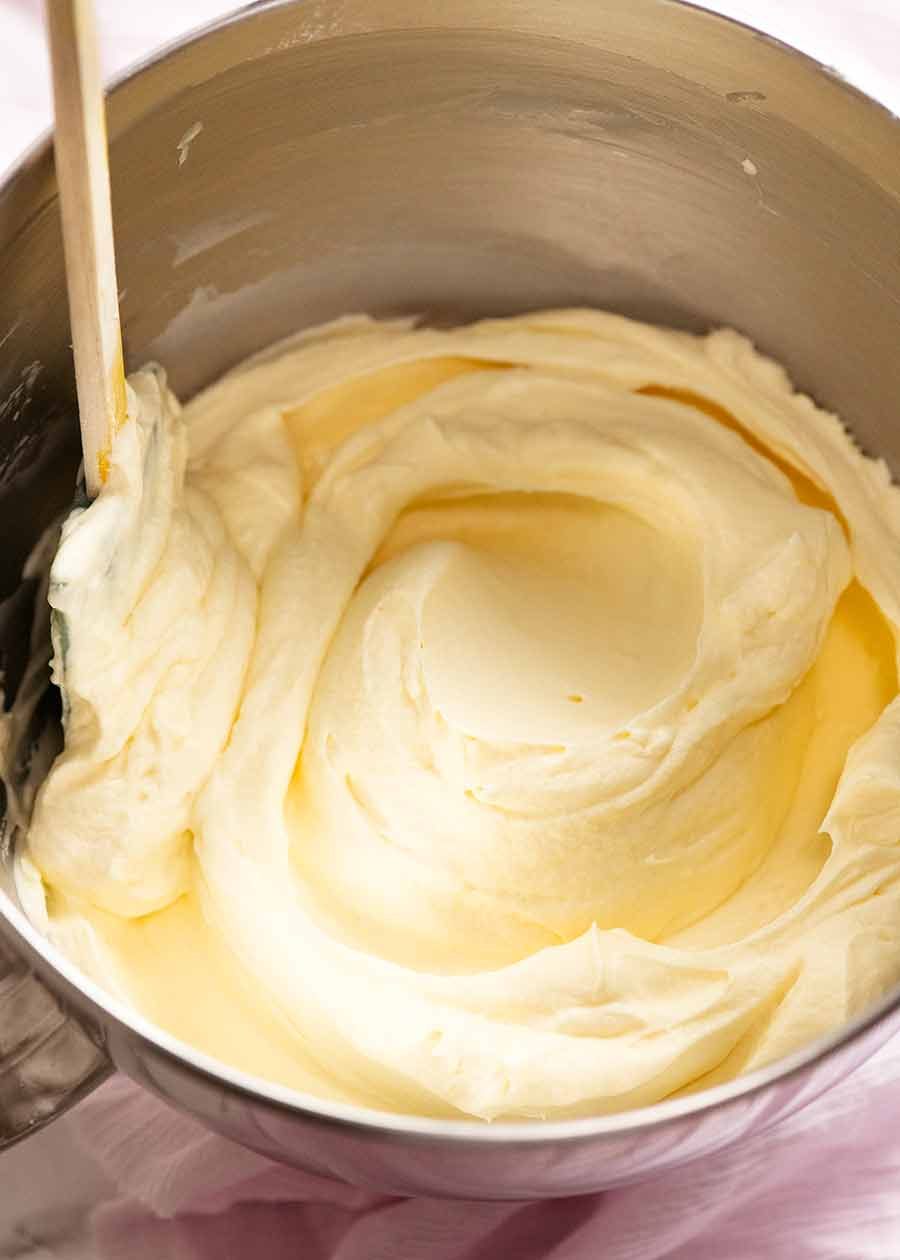
Voila! Your Fluffy Lemon Frosting is done, ready to use!
Decorating the Lemon Cake
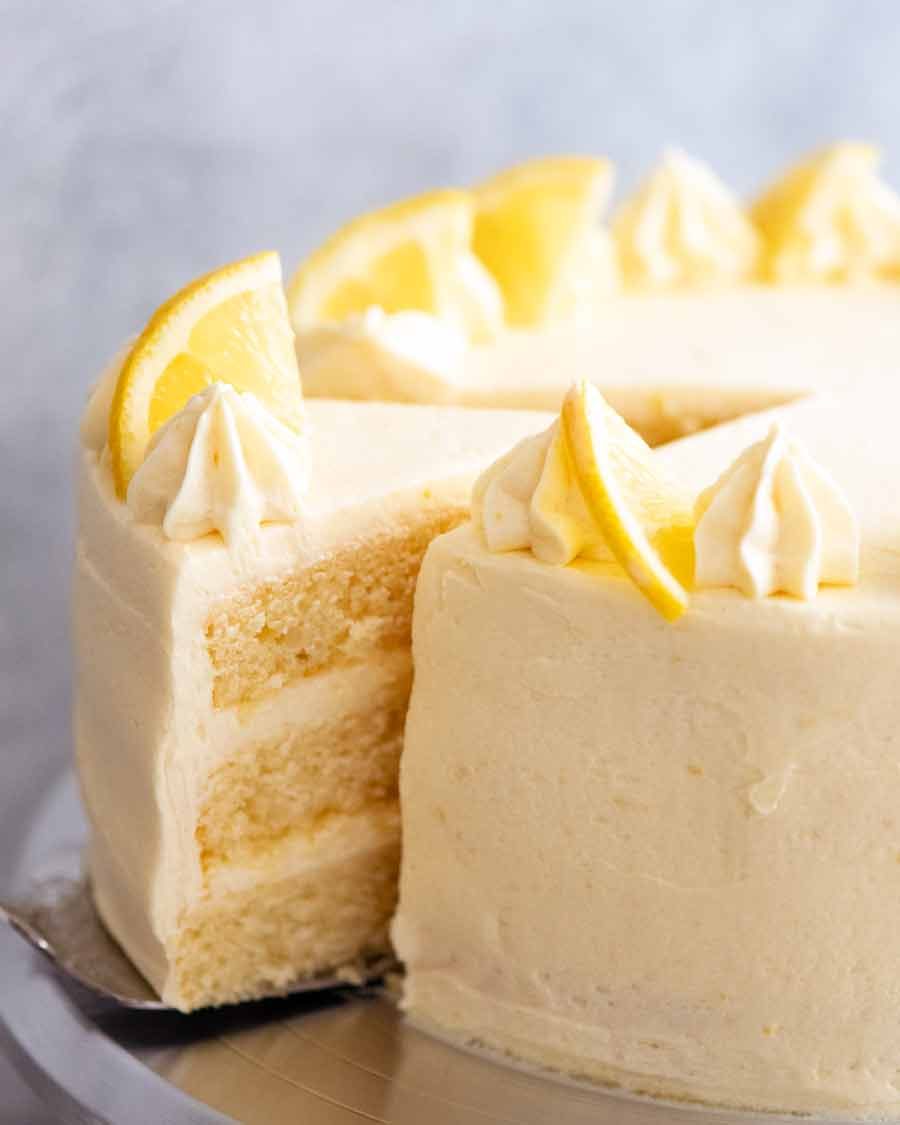
This Lemon Frosting behaves just like buttercream. So you can spread it or pipe it into beautiful swirls, even into sky-high mounds on Cupcakes if you wanted to!
In the cakes shown in this post and the recipe video, I’ve kept it pretty simple:
-
Lemon slices and fresh flowers – As shown in the photos above, I just finished the cake with a smooth frosting on the surface then decorated it with lemon slices and edible flowers. (Planting my own edible flowers is one of the best things I’ve ever put in my garden! If you’ve ever thought about planting your own, do it! They are completely low maintenance and are still thriving 9 months after planting.)
-
Lemon quarters and decorative piping – In the cake I make in the recipe video below, you’ll see that I just use leftover frosting to pipe decorative blobs around the edge of the cake, then tuck a quartered slice of lemon next to the blobs. (I’m sure there’s a proper word for the blobs, it just eludes me right now 😂)
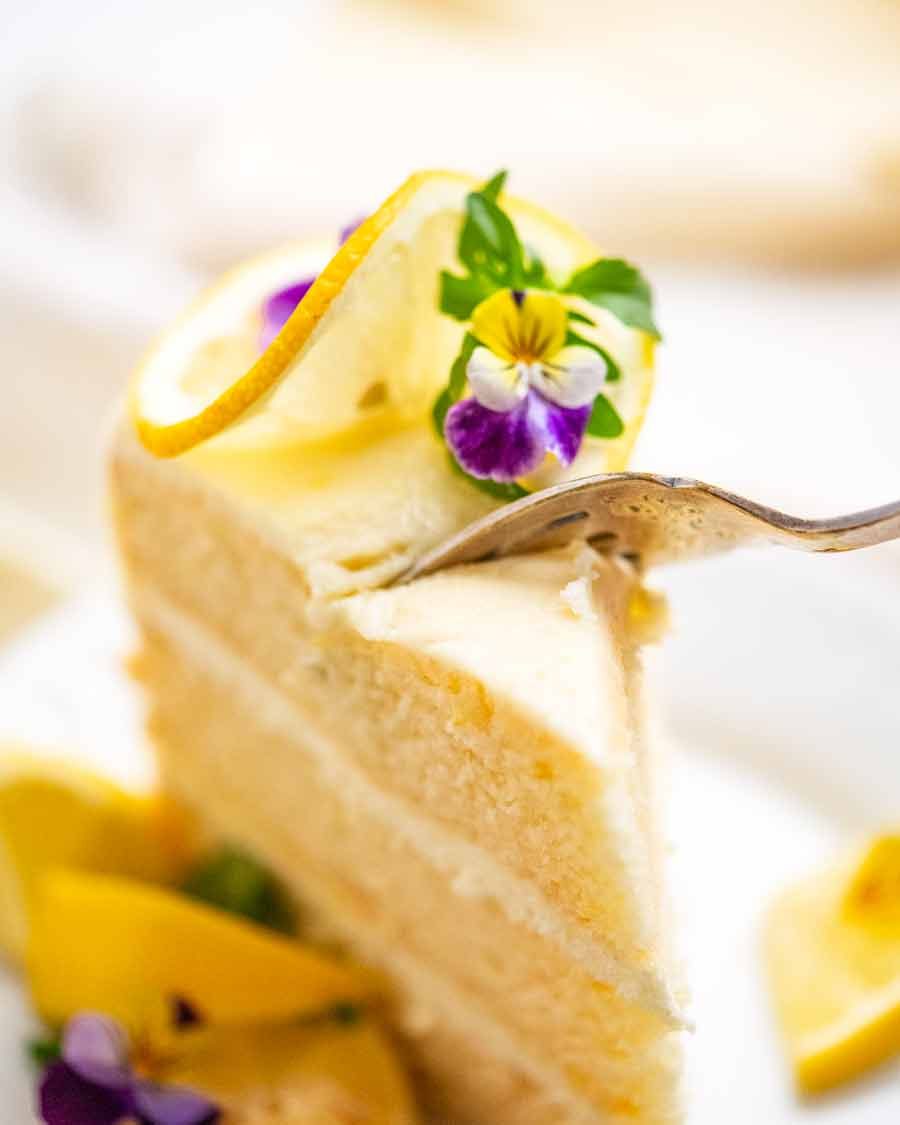
I just realised what a complete fabrication the photo above is. Look at that pathetically narrow sliver of a slice. As if I would ever cut myself a slice that tiny. What was I thinking?? 😂
Stays 100% fresh for 4 days
One very unique characteristic of this cake batter is that the crumb stays 100% perfectly fresh for 4 days, and is still excellent after even 7. That’s basically unheard of in the cake world! See the video and photo demos in the Vanilla Cake recipe.
Because this Lemon Cake has milk and butter in the frosting, it is best to store it in the fridge. But as with any cake, it must be brought to room temperature before eating. Nobody wants to eat cold, firm frosting! It must be creamy, fluffy and melt-on-the-mouth!!! – Nagi x
Watch how to make it
Hungry for more? Subscribe to my newsletter and follow along on Facebook, Pinterest and Instagram for all of the latest updates.
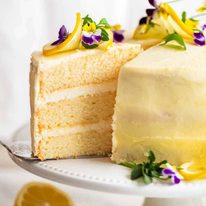
Lemon Cake – with a secret Fluffy Lemon Frosting
#wprm-recipe-rating-0 .wprm-rating-star.wprm-rating-star-full svg * { fill: #343434; }#wprm-recipe-rating-0 .wprm-rating-star.wprm-rating-star-33 svg * { fill: url(#wprm-recipe-rating-0-33); }#wprm-recipe-rating-0 .wprm-rating-star.wprm-rating-star-50 svg * { fill: url(#wprm-recipe-rating-0-50); }#wprm-recipe-rating-0 .wprm-rating-star.wprm-rating-star-66 svg * { fill: url(#wprm-recipe-rating-0-66); }linearGradient#wprm-recipe-rating-0-33 stop { stop-color: #343434; }linearGradient#wprm-recipe-rating-0-50 stop { stop-color: #343434; }linearGradient#wprm-recipe-rating-0-66 stop { stop-color: #343434; }
Bonus: this cake stays perfectly fresh for 4 whole days. That’s unheard of!
Pressed for time? Make this quick Lemon Cake with Lemon Glaze.
Ingredients
Lemon Cake
- 2 cups plain / all purpose flour (cake flour OK too, Note 1)
- 2 1/2 teaspoons baking powder (check it’s still active, Note 2)
- 1/4 tsp salt
- 4 large eggs (50 – 55g / 2 oz each), at room temp (Note 3)
- 1 1/2 cups caster / superfine sugar (granulated/regular ok too, Note 2)
- 115g / 1/2 cup unsalted butter , cut into 1.5cm / 1/2” cubes (or so)
- 1 cup milk , full fat (Note 5)
- 3 tsp vanilla extract , the best you can afford (Note 6)
- 3 tsp vegetable or canola oil (Note 7)
- 3 tbsp lemon zest (from 2 lemons)
- 1/3 cup lemon juice
- 1/4 tsp natural lemon extract (lemon oil) , recommended but not essential (Note 8)
My secret Less-Sweet Lemon Frosting:
- 6 1/2 tbsp flour, plain/all purpose
- 1 1/3 cups milk (full fat best, low fat ok, 0% fat no good)
- 1 1/3 cups caster / superfine white sugar (or granulated/ordinary)
- 300g / 1 1/3 cups unsalted butter , softened
- 3 tsp lemon zest (from 1 lemon)
- 4 tbsp fresh lemon juice
Instructions
Preparation:
-
Preheat oven to 180°C/350°F (160°C fan) for 20 minutes before starting the batter (Note 9). Place shelf in the middle of the oven.
-
Cake pans: Grease 3 x 20cm / 8” cake pans with butter, then line with parchment / baking paper. (Note 10 more pan sizes) Best to use cake pan without loose base, if you can.
Combine Dry Ingredients
-
Whisk flour, baking powder and salt in a large bowl. Set aside.
Beat eggs until aerated:
-
Beat eggs for 30 seconds on speed 6 of a Stand Mixer fitted with a whisk attachment, or hand beater.
-
With the beater still going, pour the sugar in over 45 seconds.
-
Then beat for 7 minutes on speed 8, or until tripled in volume and white.
Finish cake batter:
-
Heat Milk-Butter: While egg is beating, place butter and milk in a heatproof jug and microwave 2 minutes on high to melt butter (or use stove). Do not let milk bubble and boil (foam is ok). If you do this ahead, cover and keep hot while beating eggs.
-
Gently add flour: When the egg is whipped, scatter 1/3 flour across surface, then beat on Speed 1 for 5 seconds. Add half remaining flour, then mix on Speed 1 for 5 sec. Add remaining flour, then mix on Speed 1 for 5 – 10 sec until the flour is just mixed in. Once you can’t see flour, stop straight away.
-
Lighten hot milk with some Egg Batter: Pour hot milk, vanilla, lemon juice and zest and oil into the now empty flour bowl. Add about 1 1/2 cups (2 ladles or so) of the Egg Batter into the Milk-Butter (don’t need to be 100% accurate with amount). Use a whisk to mix until smooth – you can be vigorous here. Will look foamy.
-
Slowly add milk: Turn beater back on Speed 1 then pour the Milk mixture into the Egg Batter over 15 seconds, then turn beater off.
-
Scrape and final mix: Scrape down sides and base of bowl. Beat on Speed 1 for 10 seconds – batter should now be smooth and pourable.
Bake:
-
Pour batter into pans.
-
Knock out bubbles: Bang each cake pan on the counter 3 times to knock out big bubbles (Note 10 for why)
-
Bake 23 minutes or until golden and toothpick inserted into centre comes out clean.
Cool & frost:
-
Remove from oven. Cool in cake pans for 15 minutes, then gently turn out onto cooling racks. If using as layer cakes, cool upside down – slight dome will flatten perfectly. Level cake = neat layers.
-
Frost with provided Lemon Frosting, or Lemon Cream Cheese Frosting from this Lemon Blueberry Layer Cake recipe.
Secret Less-Sweet Fluffy Lemon Frosting:
-
Thickening roux: Place flour and sugar in a large saucepan over medium heat. Cook, stirring constantly, for 30 seconds.
-
Add milk: While whisking constantly, slowly pour the milk in (this ensure it’s lump free). As the milk gets hotter, it will start to thicken – stir constantly so the base doesn’t catch.
-
Thicken roux: Cook until the mixture thickens in a thick, dolloping custard – see video for texture. (Note 13 tip)
-
Cool: Remove from heat and scrape into a bowl. Cover with cling wrap, pressing down onto the surface to prevent a skin from forming. Cool completely (20 min counter then 30 min fridge), but do not let it get fridge cold. (Note 14) It will firm into a very thick paste.
-
FROSTING – cream butter: Beat butter with either a handheld beater or stand mixer (with whisk attachment) for 3 minutes until it’s smooth and changes from yellow to very pale yellow, almost white.
-
FROSTING – add roux: While beating on speed 5, add the roux one heaped tablespoon at a time. Take about 1 minute to add it all. Once all added, add lemon zest and juice, then whip for 2 minutes until you can see that it is stiff enough to hold peaks liek whipped cream. Do not whip more than 4 to 5 minutes (this will activate starch and make it sticky).
Frosting Cake:
-
Flip a cake layer upside down (for level surface). Spread with 3 – 4mm / 0.12 – 0.16″ frosting. Top with another upside cake layer, spread with ore frosting. Cover with final cake layer then use remaining frosting to cover top and sides.
Recipe Notes:
- Read recipe from start to finish before starting;
- Make sure your baking powder is not past its expiry – here’s how to check;
- Fresh eggs make the cake rise properly (old eggs don’t aerate as well);
- Work in order of steps per recipe;
- Don’t incorporate add-ins like funfetti (they sink); and
- Once you start, keep going until it’s in the oven. Do not at any point leave batter sitting around – bubbles will subside!
Stand Mixer speeds are for a Kitchen Aid and also for hand beaters.
RECIPE NOTES
1. Cake flour works just fine with this recipe, but butter and vanilla flavour, and crumb is ever so slightly better using plain / all purpose flour. Also, cake flour makes the cake surface sweaty and sticky the next day.
2. Caster / superfine sugar are finer grains than regular / granulated sugar so it dissolves when whipped with the eggs. Granulated / regular sugar sometimes doesn’t fully dissolve which doesn’t affect the cake rise or texture but can leave some very brown sugar specks on the surface / sides. Not a big deal – just visual if serving undecorated.
3. Eggs – important to be at room temp as they fluff better when whipped which is key to the fluffy texture of this cake. Also, fresher eggs aerate better = better rise. Old eggs don’t fluff as well.
Quick way to warm up fridge cold eggs – place in a large bowl, cover with warm tap water (just warm, not hot), leave for 5 minutes. Wipe dry (to avoid residual water dripping into bowl), then use per recipe.
Large eggs – 50 – 55g / 2 oz per egg this is the industry standard of egg sizes sold as “large eggs” in Australia and the US. If your eggs are significantly larger or smaller in size, just weigh your eggs and use 200 – 220g / 8 oz in total (including shell) or 180 – 200g / 7.3 oz in total excluding shell (this is useful if you need to use a partial egg to make up the total required weight. Just crack eggs, whisk THEN pour into a bowl to measure out what you need).
4. Baking powder – dead baking powder is a common problem with cake fails, even if not past the expiry date. Here’s how to check yours is still good.
Baking soda (bi-carb) won’t make the cake rise quite as well. If you have no choice, then use 3/4 teaspoons of baking soda.
5. Milk – if you sub with lower fat milk then the texture of the crumb becomes a little less tender. Do not substitute with non-dairy milk, such as soy or almond milk.
6. Vanilla come in all sorts of qualities. I use Vanilla Extract. Better quality (more expensive) = better flavour, but I think vanilla bean paste is wasted in cakes.
7. Oil – just 3 teaspoons makes a noticeable difference to the tenderness of the crumb AND keeps the crumb moist for days.
8. Natural lemon extract – To give the lemon flavour a slight boost! Comes in small bottles like food colouring. Not essential, but does drive home that lemon flavour in a way you can’t achieve using just juice and zest (unless you use way more which compromises cake rise).
9. Oven preheating – 30 minutes preheat is recommended to ensure no loss of heat when the oven door is opened. Never use the rapid heat function on your oven for baking, no matter how fancy your oven is!
10. Cake pans:
- Type – The batter is quite thin so to ensure no leakage, do not use a cake pan with a loose base. Springform is ok but use butter to firmly fill the gap and for extra insurance, try to cut the paper for the base slightly larger so it goes slightly up the wall.
- Don’t have 3 cake pans? Fill one 20cm/8″ cake pan with 2/3 of the mixture (bake 32 min) and the other with 1/3 (bake 23 min). Split the larger one in half once cool.
- Baking on different shelves – If they don’t all fit, put 2 on the middle shelf and one on shelf below. Take out top 2 at 23 minutes, then move bottom one up and bake for further 2 minutes.
- Cake pan sizes – click here for a useful table of different cake pan sizes, cake height and bake times.
11. Knock out big bubbles by banging pan on counter that causes irregular holes inside crumb and unsightly bubble brown spots on the surface. Does not burst the tiny bubbles that make the cake rise – they are too small to bang out!
12. Cake sweetness note – sweeter than Asian cakes, less sweet than typical Western butter cakes. Please do not reduce sugar – 1 1/2 cups is minimum required to make the eggs foamy enough to rise.
13. Roux thickness – Thicker texture = thicker frosting texture but won’t make the frosting dense, it’s still fluffy and spreadable but it just makes it “sturdier” with sharper edges when piped.
14. Cooling roux down – Roux needs to be at room temp (17 – 20°C /63-68°F in order to incorporate with the butter. If too hot, will melt butter. If too cold, won’t blend in with butter. You can leave in fridge overnight but take it out 1 hour prior to using (to dechill – otherwise it won’t mix well with softened butter).
14. Different measures in different countries – tablespoon and cup sizes differ slightly from country to country. In most recipes, the difference is not enough to affect the outcome of the recipe, but for baking recipes, you do need to be careful.
This cake recipe has been specifically tested using both US and Australian cups (the two countries with the greatest size variance) and the cakes were exactly the same. So you can have confidence that this recipe can be used no matter which country you are in – only exception is Japan (cup sizes are considerably smaller (200ml) so please use weights provided).
For absolutely certainty, opt to use the weights provided (click Metric toggle button above ingredients). Professional kitchens only use weights.
15. Storage – if not frosting immediately once cooled, cover surface with baking paper (surface gets tacky), then wrap in cling wrap immediately then place in an airtight container. Do not leave it sitting around for hours once cooled, cakes go stale quite quickly. Leave out rather than in fridge, unless it’s super hot where you live. Keeps in freezer for 3 months.
Frosted or wrapped unfrosted cake keeps perfectly for 4 days (practically like freshly made). Still good on Day 7 but a bit less moist.
Once frosted, store in fridge – will keep for 4 to 7 days per above – and bring to room temperature before serving. Nobody likes cold stiff frosting – we want it creamy!
16. Nutrition per slice, assuming 12 servings, cake and frosting. Eat salad tomorrow.
Nutrition Information:
Life of Dozer
You’d think this dog never gets out, the way he carries on lying forlornly by the front door. As you all well know, he gets out for a good play every single day and I take him everywhere with me!!! #DramaQueen

