If I only had room for one Sweet Tart Crust recipe in my life, this would be it. Called Pâte Sucrée in French, it’s an excellent master pastry for all sweet tarts. Buttery and not too sweet, flaky but not so crumbly that makes it difficult to eat with a fork. Plus, the dough is extremely easy to work with – easier than Shortcrust Pastry.
This is the pastry crust I used in the Pistachio Pear Tart recipe I also shared today!

About this Sweet Tart Crust (sweet pastry recipe)
This is a recipe for a classic French Sweet Tart Crust that is suitable to use for tarts, large or small, or for sweet pies. It can be cooked in a tart tin, as demonstrated in this post, or in pie tins.
You’ll love how the dough is easier to work with than traditional shortcrust pastry. It’s less crumbly, more pliable and less prone to tearing. And you’ll love how the crust is not quite as crumbly and flaky as shortcrust pastry so it’s easier to eat with a fork, rather than disintegrating into crumbs.
It’s still however beautifully buttery – it is French after all, so we would expect nothing less! – yet without being excessively sweet.
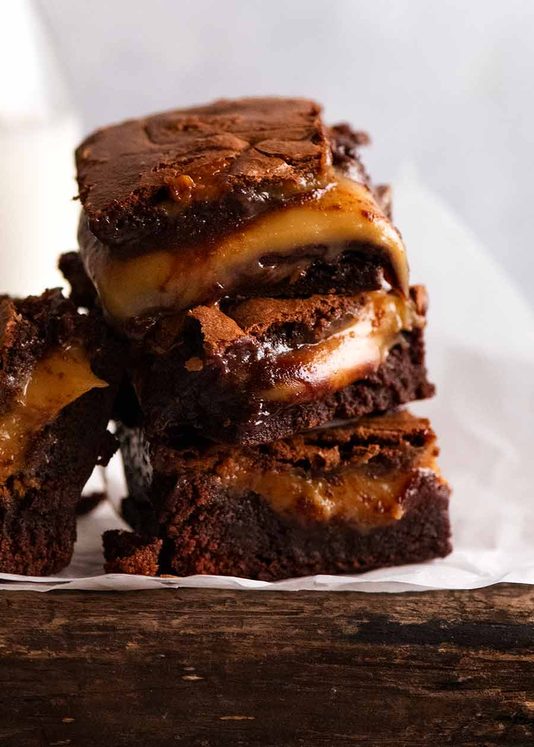
As for its utility, it makes a tart shell that is crispy so the base won’t go soggy once filled. It’s suitable for no-cook fillings (like Chocolate Ganache) or cooked fillings (ie. where the tart is filled then baked again, like Pistachio Pear Tart and the Chocolate Tart pictured below).
In short, it’s a master recipe worth, well, mastering – I promise it will serve you well for the rest of your life!!

What goes in this Sweet Tart Crust
Here’s what you need to make this tart pastry:

-
Flour – Just plain / all purpose flour;
-
Icing sugar / powdered sugar – The finer, powder-like grains make this incorporate more thoroughly and easily into the dough compared to ordinary white sugar grains;
-
Almond meal / ground almonds – Not to be confused with almond flour which are finer grains, this adds a touch of nuttiness that complement sweet fillings as well as adding a hint of moistness to the pastry; and
-
Butter – Ain’t no French pastry if it doesn’t contain plenty of butter! 😂


How to make Sweet Tart Pastry
1. The tart pastry dough

-
Mix the flour, icing sugar, almond meal and salt, then use your fingers to rub the butter in until it resembles breadcrumbs;
-
The mixture should be a bit like wet sand that can run through your fingers;
-
Add egg and mix through with a rubber spatula until the mixture stiffens to the point you can’t really mix any more;
-
Now turn the dough out onto a work surface and use your hands to bring it together into a dough. You don’t need to knead it, just bring it together into a smooth ball;
-
Shape the dough into a ball then pat it down into a 2.5cm / 1″ disc; and
-
Wrap with cling wrap, and refrigerate for 30 minutes or even overnight.
2. Rolling out the pastry

-
Remove the dough from the fridge and unwrap. Note: If you refrigerated overnight or much longer than 30 minutes and the pastry is rock solid, leave it out for a bit until it softens enough that it can be rolled out;
-
Place the dough on a lightly-floured work surface, then sprinkle the dough surface lightly with flour;
-
Roll out into a 32cm / 13″ round, 3mm / 1/8″ thick;
-
To transfer the pastry into the tart tin, roll the pastry onto the rolling pin, taking care not to stretch the pastry. Stretching the pastry causes shrinkage when it bakes;
-
Gently unroll the pastry over the tart tin;
-
Use your fingers to drape it in and gently coax it into the corners to fill the tart tin, as opposed to pulling or stretching it. As noted above, if you stretch the pastry, it will shrink back as it bakes;
-
Drape the excess pastry outside the rim of the tart tin, then roll the rolling pin across the surface to cut the excess off; and
-
Remove excess pastry (but keep it, in case there’s a patching-up emergency to tend to later!)
3. Baking

-
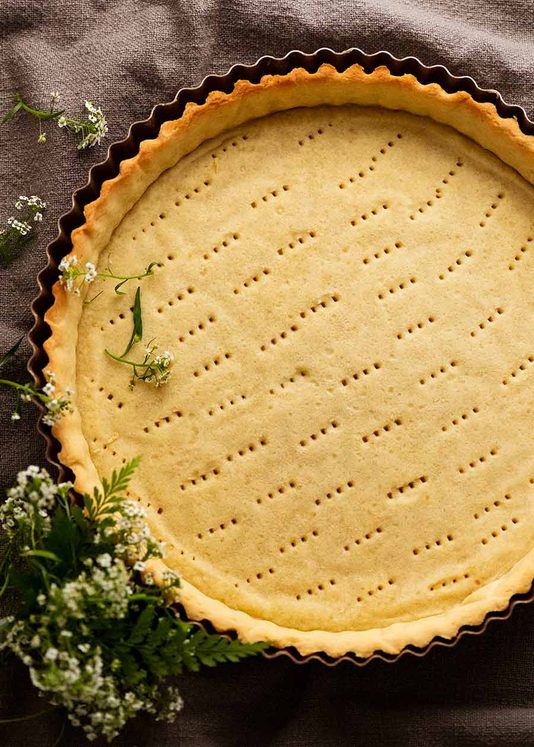
Prick base – Prick the base with a fork. This allows steam to escape which stops the base from puffing up, so you have a nice smooth and not a bubbled base;
-
Fridge for 30 minutes – Refrigerate for 30 minutes.
-
Prepare blind baking – Cover the pastry with 2 large sheets of baking / parchment paper one on top of the other in a short “X”, then fill with baking beads to weigh it down. The purpose of these weights is to prevent the base from puffing up and the sides from collapsing inwards during this blind baking stage.
Don’t have baking beads? Use 2 cups dried rice or dried beans instead;
-
Blind bake: Bake at 200°C/390°F (180°C fan) for:
• 15 minutes (Par Baked Crust) – if the tart, once filled, will be baked for more than 30 minutes; or
• 20 minutes (Fully Baked Crust) – if you are making a no-bake tart (ie. no baking once filled) or a tart that is baked 25 minutes or less once filled; -
Remove beads CAREFULLY! Remove crust from oven, then remove the beads. Lift them out using the paper overhang and put them in a bowl. Be careful here – nobody wants to pick up hot beads scattered all over the kitchen floor!
-
Bake uncovered – Return the uncovered tart crust to the oven and bake for a further:
• 5 minutes (Par Baked Crust) – if the tart, once filled, will be baked for more than 30 minutes; or
• 10 minutes (Fully Baked Crust) – if you are making a no-bake tart or a tart that is baked 25 minutes or less once filled;
Fully cool before filling – this will ensure the base stays nice and crispy rather than going soggy.
Why the different baking times? Par Baked vs Fully Baked Tart Crust.
If the tart will be baked for more than 30 minutes once filled, then the pastry will finish cooking through during this time. In this case, we just make a Par Baked Crust ie cooked enough so the surface is crisp and protect base from going soggy, but inside of base is slightly undercooked. This way, the tart crust will not be dry and overcooked once the filling is cooked.
However, if you’re making a tart with a filling that doesn’t require baking OR the bake time once filled is very short (25 minutes or less), then we need to fully cook the shell through before filling. So use the Fully Baked Crust bake times.

How to use this pastry crust
This pastry shell can be used for baked or no-bake fillings. The shell is cooked enough so it is crispy on the outside, but slightly undercooked on the inside, and the surface is light golden. This is so once it’s filled and then baked again (anything up to around 45 minutes), the pastry will finish cooking through and the edges will be a lovely golden colour rather than burnt, as shown in the Pistachio Pear Tart pictured below.
If using for a no-bake filling (for example, if filling with Creme Patissiere) or a filling that requires less than 25 minutes of bake time (like a Chocolate Tart that I will be sharing soon that bakes for 25 minutes at a low temperature), then the bake time needs to be increased by 10 minutes to fully cook the pastry through.
The pastry shell can be made up to 3 days ahead and stored in an airtight container in the pantry.

Fillings for Tarts
I wish I had a library of tart recipes I could share with you to fill this tart shell with! But I’m just starting out on my tart collection journey, so I’m a bit lacking. However, here are some ideas:
-
Pistachio Pear Tart – the tart recipe I shared today that I used this tart crust for. With a Pistachio Frangipane Filling topped with soft Vanilla Poached Pears, this is a smart yet rustically casual tart fitting for all occasions!
-
Salted Caramel Tart – use the filling from my Salted Caramel Tart recipe (which uses a biscuit base, just fill this pastry shell instead);
-
Peanut Butter Caramel Tart – use the filling from my Peanut Butter Caramel Tart recipe;
-
Pecan Tart – use the filling from my Pecan Pie;
-
Chocolate Custard Tart – use the filling from my Chocolate Cream Pie;
-
Lemon Tart – I use the lemon filling from this Lemon Tart recipe by David Lebovitz. I find it a bit too tart – as in sour, hah – as written (and I don’t even have a sweet tooth!). So I reduce the lemon juice to 3/4 cup and increase the sugar to 1 cup;
-
Lemon Meringue Tart – Top the above Lemon Tart with Italian Meringue. I use this recipe. It involves hot sugar syrup slowly drizzled in while beating the meringue. You can’t just use ordinary whipped egg whites with sugar as it will weep / sweat; and
-
Custard Fruit Tart – I haven’t published this yet, but here is a PDF of the recipe!
So many more possibilities … but that’s a few to get you inspired! – Nagi x
Watch how to make it
Hungry for more? Subscribe to my newsletter and follow along on Facebook, Pinterest and Instagram for all of the latest updates.

Pâte Sucrée – French Sweet Tart Crust (pastry dough)
#wprm-recipe-rating-0 .wprm-rating-star.wprm-rating-star-full svg * { fill: #343434; }#wprm-recipe-rating-0 .wprm-rating-star.wprm-rating-star-33 svg * { fill: url(#wprm-recipe-rating-0-33); }#wprm-recipe-rating-0 .wprm-rating-star.wprm-rating-star-50 svg * { fill: url(#wprm-recipe-rating-0-50); }#wprm-recipe-rating-0 .wprm-rating-star.wprm-rating-star-66 svg * { fill: url(#wprm-recipe-rating-0-66); }linearGradient#wprm-recipe-rating-0-33 stop { stop-color: #343434; }linearGradient#wprm-recipe-rating-0-50 stop { stop-color: #343434; }linearGradient#wprm-recipe-rating-0-66 stop { stop-color: #343434; }
Ingredients
- 1 1/2cupsflour, plain/all purpose
- 6 1/2tbspsoft icing sugar / powdered sugar, sifted (Note 1)
- 2 1/2tbspalmond meal / ground almonds(Note 2)
- 1/4tspsalt
- 100g / 7 tbspbutter, unsalted, softened, cut into 1cm cubes
- 1large egg, at room temperature (55-60g/2 oz) (Note 3)
Instructions
Tart dough:
-
Mix Dy Ingredients: Whisk together flour, icing sugar, salt and almond meal in a bowl.
-
Add butter: Use your fingertips to rub the butter into the dry ingredients until it resembles breadcrumbs. (Note 4).
-
Add egg: Mix with a rubber spatula until it becomes too hard to stir anymore, then use your hands to bring it together into a dough.
-
Bring dough together: Turn dough out onto a work surface, then knead to bring together into a smooth ball. Flatten into a 2cm / 0.8″ thick disc. Wrap with cling wrap and refrigerate for 30 minutes.
Rolling out:
-
Unwrap chilled dough. Place on a lightly floured work surface.
-
Roll out into a 32cm / 13″ round (3mm / 1/8″ thick).
Line tart tin:
-
Line tart tin: Roll pastry lightly on to a rolling pin (ie. so it wraps around itself). Then unroll it gently over the tart tin.
-
Fit pastry: Adjust the pastry to fit into the tart tin, fitting into the corner, taking care not to stretch it (causes shrinkage during bake).
-
Trim excess dough: Roll the rolling pin over tart tin to trim excess dough. Pictured tart tin is 24 x 3 cm / 9.5 x 1.2″ – you can use any up to this size.
-
Prick the base of the pastry 30 times with a fork. Not all the way through – just make a light prick on the surface.
-
Chill pastry in tart tin for 30 minutes.
Baking:
-
Preheat oven to 200°C / 390°F (180°C fan).
-
Baking beads: Cover pastry with 2 sheets of baking paper (parchment paper), in a “X” arrangement. Fill with baking beads (or 2 cups dry raw rice or beans).
Par Baked Tart Crust:
-
Baking times for a Par Baked Tart to be used for tarts that are baked for > 30 minutes once the filling is added into the cooked tart shell.
-
Bake 15 minutes the remove from oven. Use excess paper to remove baking beads.
-
Bake uncovered 5 minutes: Return tart crust to oven for 5 minutes. Pastry should be light golden, crispy on surface, but slighty undercooked inside (will finish cooking once filled and baked again).
Fully Cooked Tart Crust:
-
Use these baking times if the tart shell is to be used for raw fillings (ie tart not baked once crust is filled) OR fillings that are baked for < 25 minutes.
-
Bake 15 minutes the remove from oven. Use excess paper to remove baking beads.
-
Bake uncovered 10 minutes: This will fully cook the pastry through and give it nice colour which we need as the pastry won’t cook through in less than 25 minutes once filled.
Cool & use
-
Cool: Remove then cool in tart tin before filling (this ensures crust stays crispy once filled), then baking again if filling needs to be cooked (like this Pistachio Frangipane Pear Tart).
-
Make ahead up to 3 days, suitable for baking once filled.
Recipe Notes:
Nutrition Information:
Life of Dozer
Dozer vs Nagi in the battle of the doughnut. Who won??