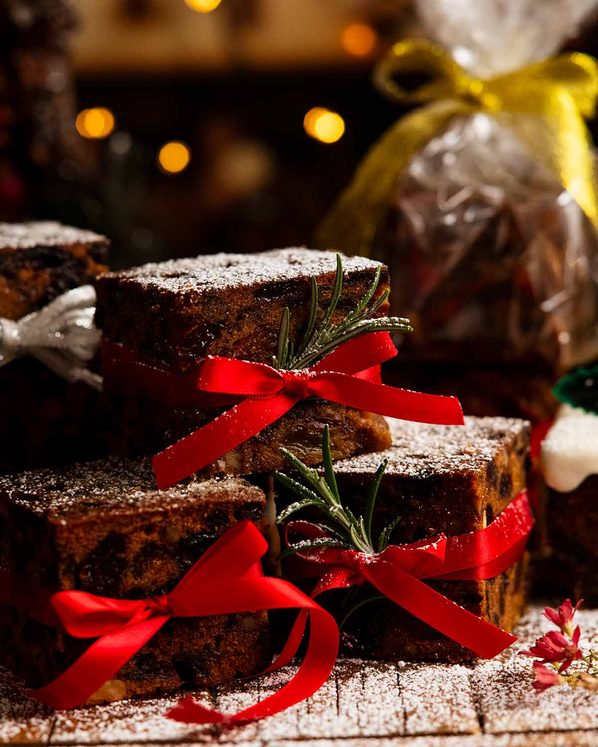
Mini Christmas Cakes! Great to serve at gatherings and ideal for gifting – long shelf life, packages up beautifully, easy to make and economical. Made with my classic Christmas cake batter, the rich fruit cake is moist and velvety.
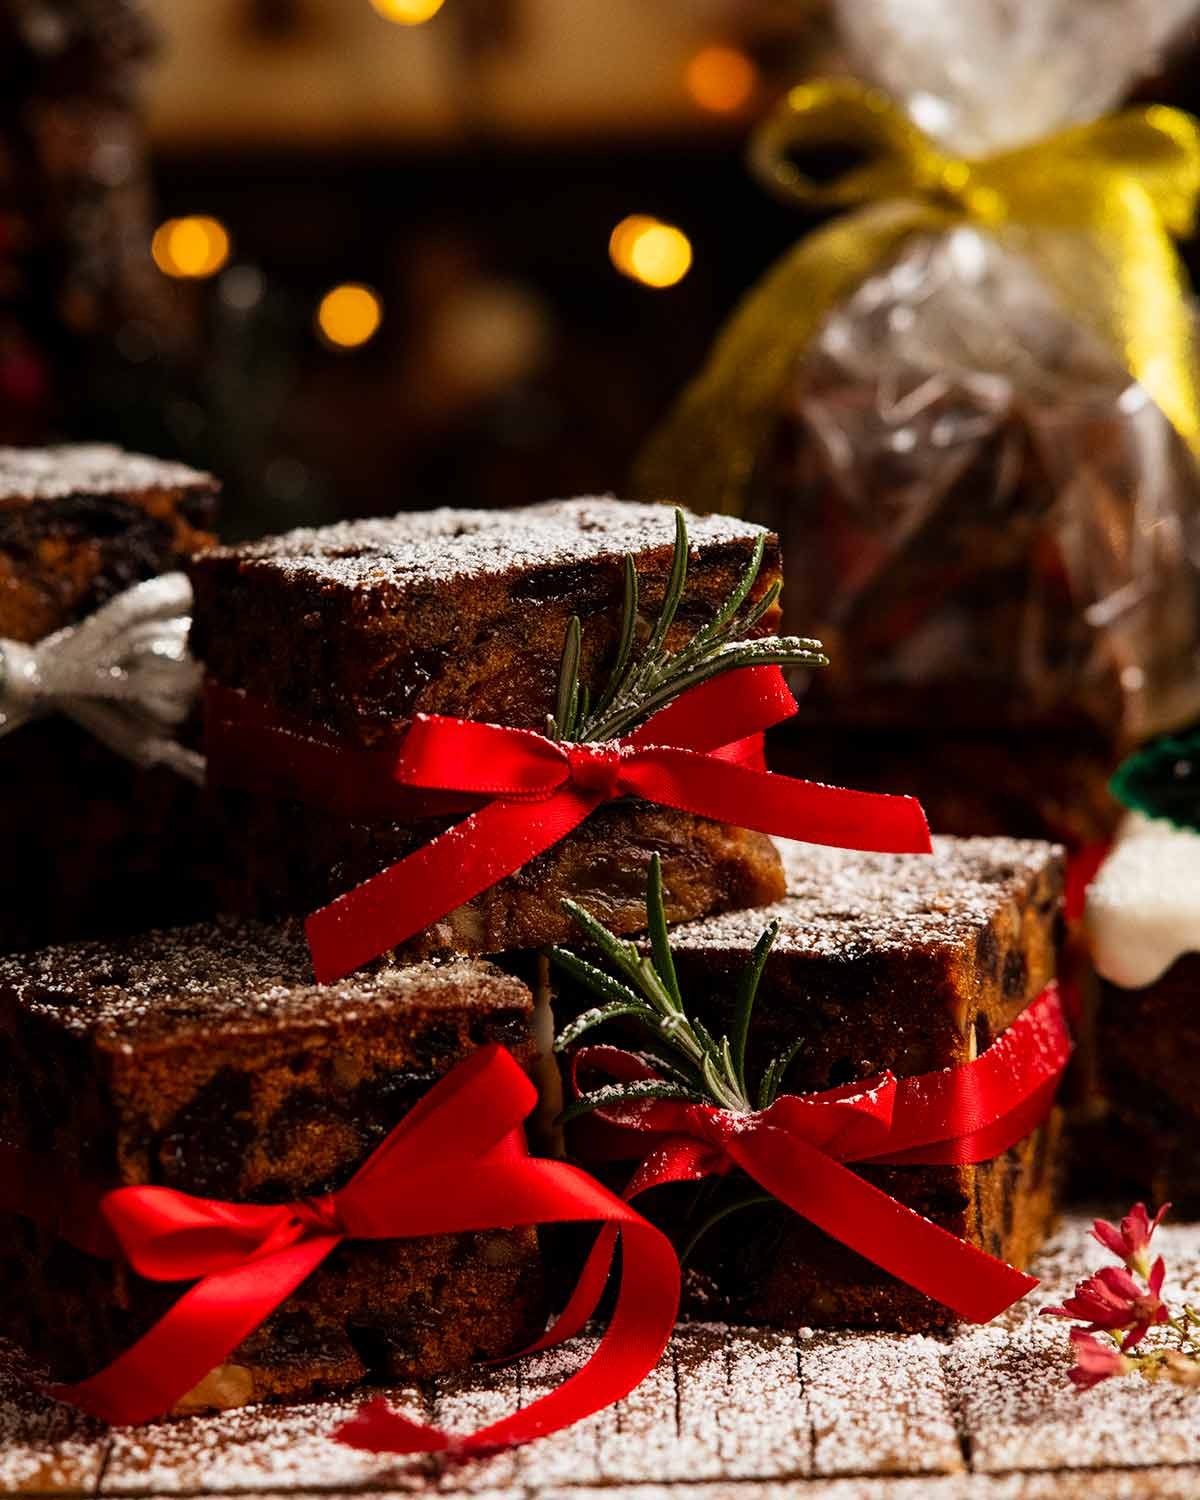
Mini Christmas Cakes
Here are the Mini Christmas Cakes I promised in last weeks’ Holiday Gift Guide!! This is just my classic Christmas Cake converted into mini form. They look so great on a platter to serve at gatherings, and are also ideal for gifting because they have a long shelf life. The cake is beautifully moist, rich with dried fruit, perfumed with Christmas spices. Dense, but soft pudding-like, not like a brick as many store bought ones are.
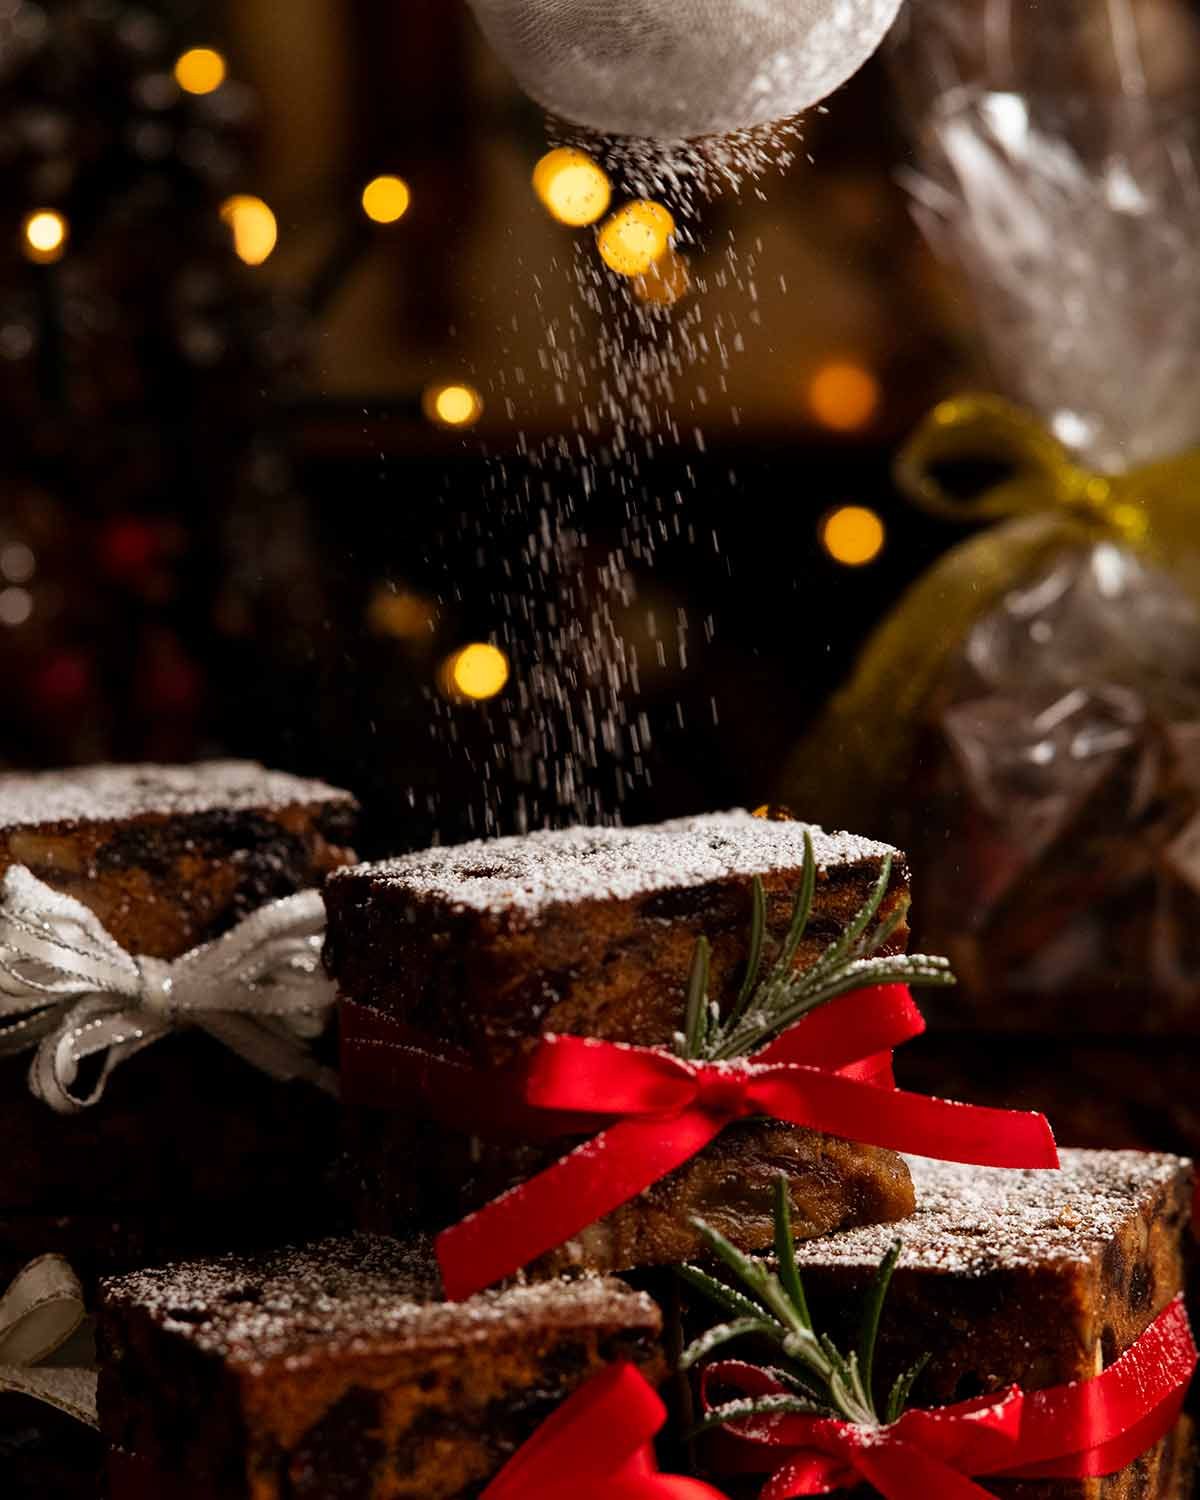
I also like that they’re easy to dress up for serving and gifting, because this Christmas Cake is designed to be eaten plain. So you don’t need to fuss to work around frosting or add a sauce for serving. Just dust with icing sugar, then for an extra Christmassy touch, tie a ribbon around each one and add a sprig of rosemary!
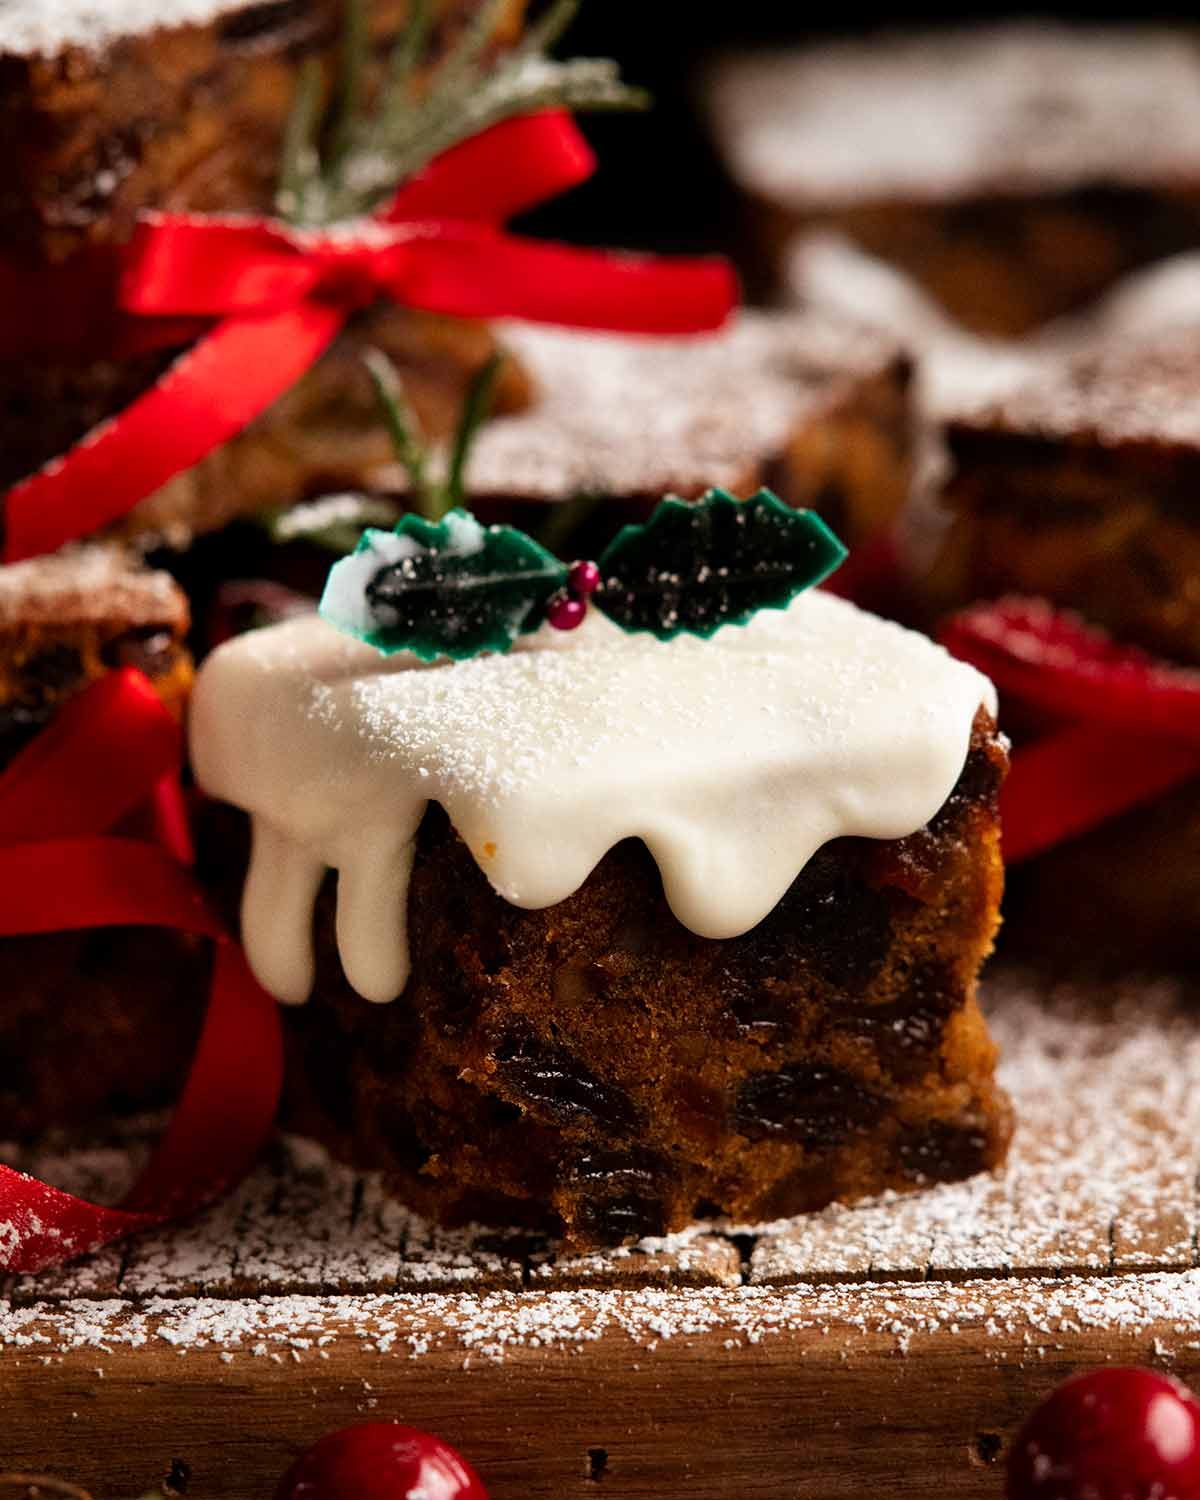
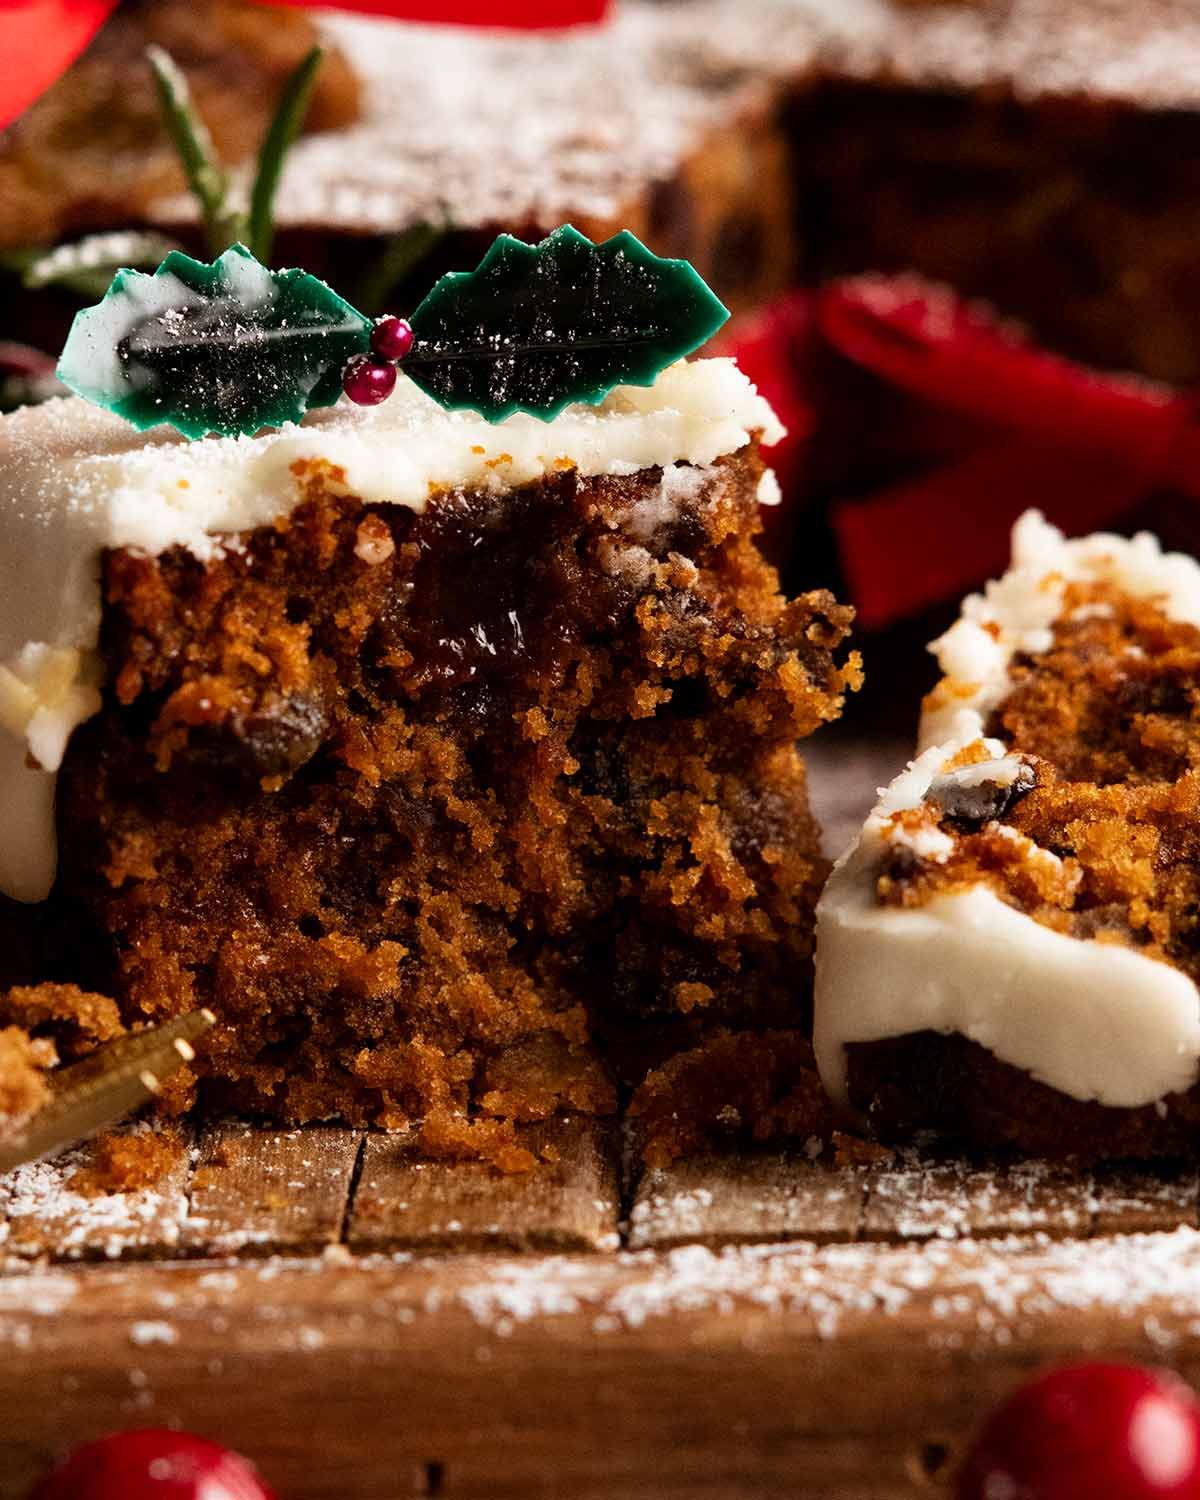
Also – the option to add a Christmas pudding drippy glaze!
What you need to make Mini Christmas Cakes
A LOT of dried fruit and very little cake batter!! 🙂
1. SOAKED DRIED FRUIT (booze optional)
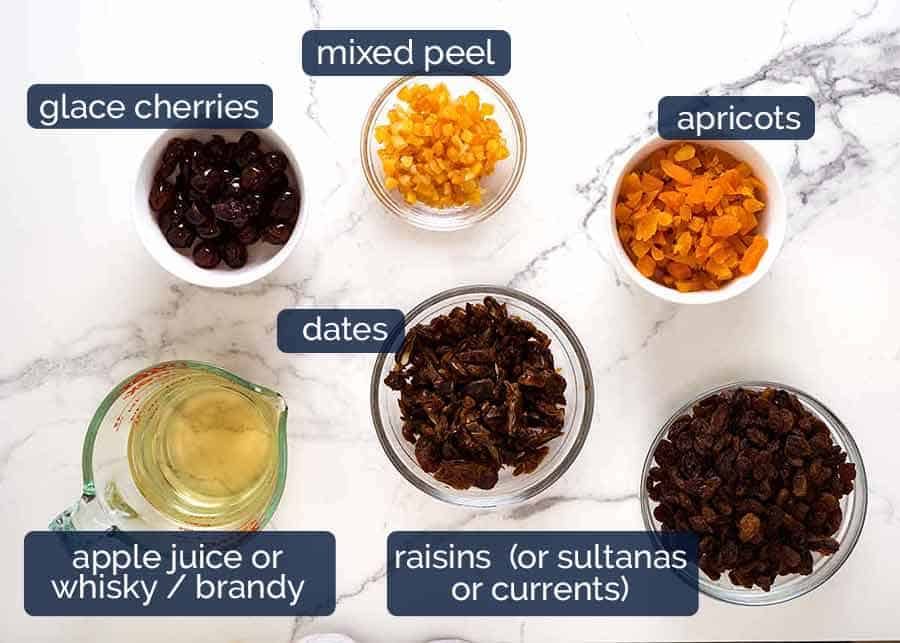
Here’s what you need for the Soaked Dried Fruit. The fruit is soaked in either apple juice OR a combination of apple juice and brandy (for those who like boozy Christmas Cake).
Dried fruit mix speedy option – While I like to chop my own dried fruit (cake is softer, you get better flavour and I can use the ratios I like), feel free to use a store bought mix of pre chopped dried fruit for convenience.
-
Use any dried fruit you want – As long as it weighs 855g / 30 oz in total. The selection above is the mix I like!
-
Mixed peel is a store bought mix of dried, crystallised (ie sugared) lemon and orange peel. Usually it comes pre chopped – I like to chop it a bit finer. I like less citrus peel than some recipes because I’m too scarred by all those times I bit into a huge piece of orange peel. Just not to my taste! Don’t use FRESH orange and lemon peel, it will be too strong and too bitter. I do not know how much fresh peel to substitute this for.
-
Juice and/or booze – for a traditional boozy Christmas Cake, just switch 1/3 of the apple juice with brandy. Can also sub apple juice with orange juice if you want a stronger citrus flavour.
2. CHRISTMAS CAKE BATTER
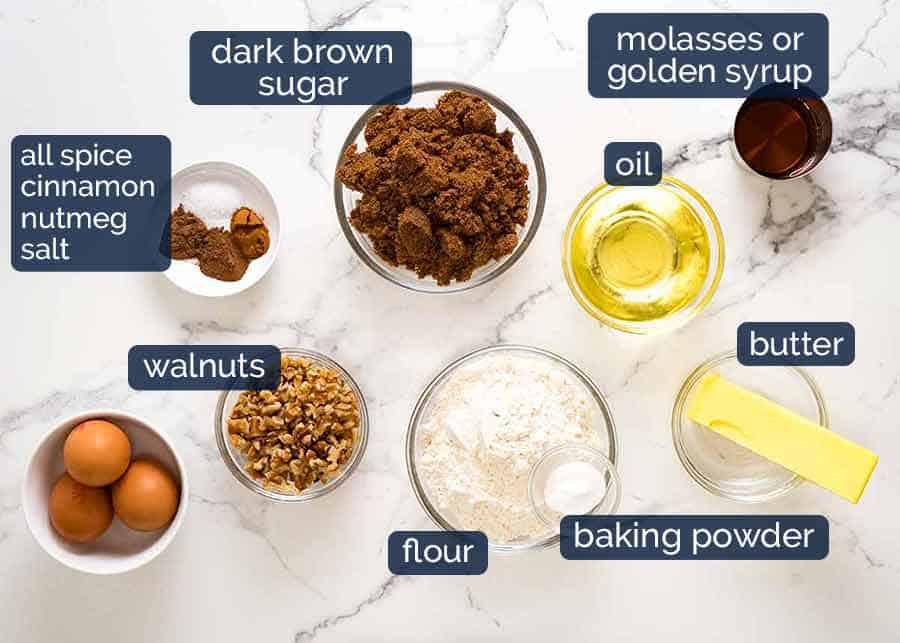
And here’s what you need for the cake batter part. The cake has very little baking powder because it’s quite a dense cake with a pudding-like texture. But it’s still got a distinct “cake” texture – unlike some Christmas Cakes that are so dense they are like eating fudge!
-
Brown sugar – Dark brown sugar gives the cake a richer colour and that is what I use for my classic single large Christmas cake. For individual ones, I prefer a slightly lighter coloured crumb so the fruit bits stand out more, so I use regular brown sugar.
-
Molasses / golden syrup – adds to the richness of flavour and colour of cake. Either is fine – I interchange year on year.
-
Walnuts – sub with any nuts of choice, or leave it out completely.
-
Oil AND butter – oil is what gives this cake a superb moistness. Butter is for flavour!
-
Eggs – This is what makes the cake hold together rather than being crumbly.
-
Flour – Just regular plain / all-purpose flour. Self raising flour can be used to substitute the flour and baking powder but the cake may dome a little more than pictured.
-
Spices – All spice, cinnamon and nutmeg. Classic Christmas cake flavours!
How to make Mini Christmas Cakes
The only difference between this and my classic Christmas Cake is that I bake it in a square pan so I can cut into square individual cakes.
Pan size – I use a 20 cm / 8″ square pan which makes a 4.5cm / 1.8″ tall cake so when cut into 9 squares, they are a nice tall height and impressive gift-giving size. Feel free to use a larger pan – for example, a 23 x 33cm / 9 x 13″ pan will make a 2.3cm / 1″ tall cake which you can cut into more pieces. You can also use a muffin tin lined with silver foil patties.
1. Baking the Christmas cake
The key step that makes this so much faster to make than other fruit cakes is the fruit soaking step. Most recipes call for dried fruit to be soaked overnight. I take a speedy approach: just microwave the dried fruit with juice and/or brandy, then stand for 1 hour to soak up the liquid. So much faster – and just as effective!
-
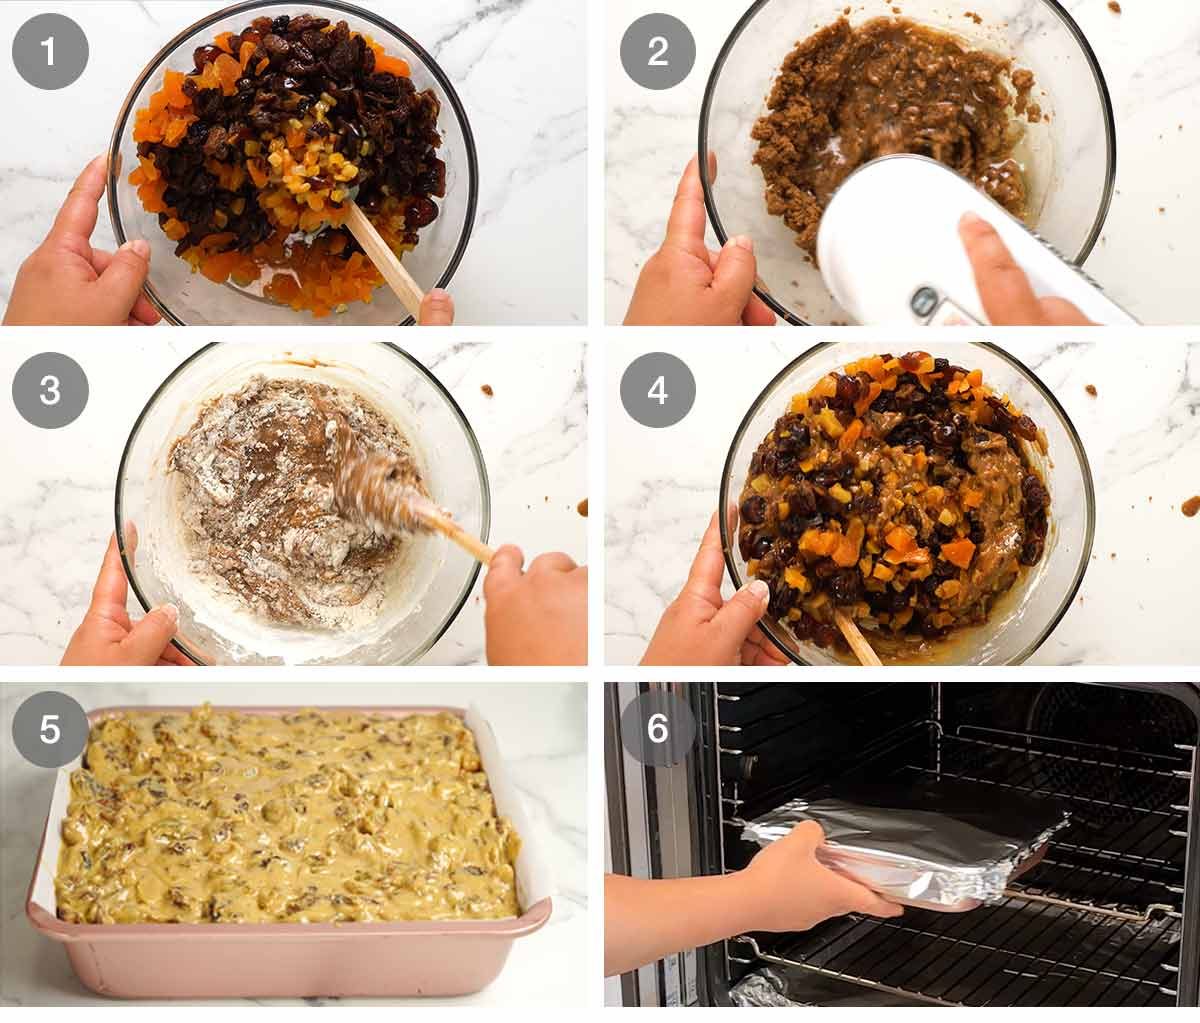
Soak fruit – Microwave the dried fruit with the juice/brand for 1 1/2 minutes or until hot. Stir to coat then set aside for 1 hour to let the fruit soak up the liquid and plump up.
-
Batter – Beat the butter and sugar for 1 minute until light and fluffy. Because of the volume of sugar vs butter, it won’t look creamy but you can tell it’s soft from the texture. Then beat in the oil and molasses, then the salt, spices and baking powder. Then beat in the eggs one at a time, beating until just incorporated.
-
Mix in the flour using a wooden spoon.
-
Soaked fruit – Then mix in the dried fruit, including any residual liquid left in the bottom of the bowl.
-
Pan – Pour the batter into a lined 20cm / 8″ pan. It will fill it right to the top and that’s fine, the cake barely rises. As noted above, it’s a dense cake but it’s not brick-like! It’s still distinctly cakey.
-
Bake 2 1/2 hours – Cover the cake with a sheet of baking paper (which will peel off without ripping the cake surface off), then foil. Then bake for 2 hours, remove foil and paper, then bake for a further 30 minutes uncovered to colour the surface.
Cool – Remove the cake from the oven and let it cool for 10 minutes in the pan before transferred to a rack to fully cool.
2. Cutting mini cakes
I like to cut into 9 squares because I think the proportions look nice and the cake is a gift-worthy size. To be specific, they are 6.5cm / 2 1/2″ squares that are 4.5cm / 1.8″ tall. As noted above, feel free to use different size pans. For example, a 23 x 33cm / 9 x 13″ pan will make a cake that is 2.3cm / 1″ tall and you will be able to cut many more pieces.
-
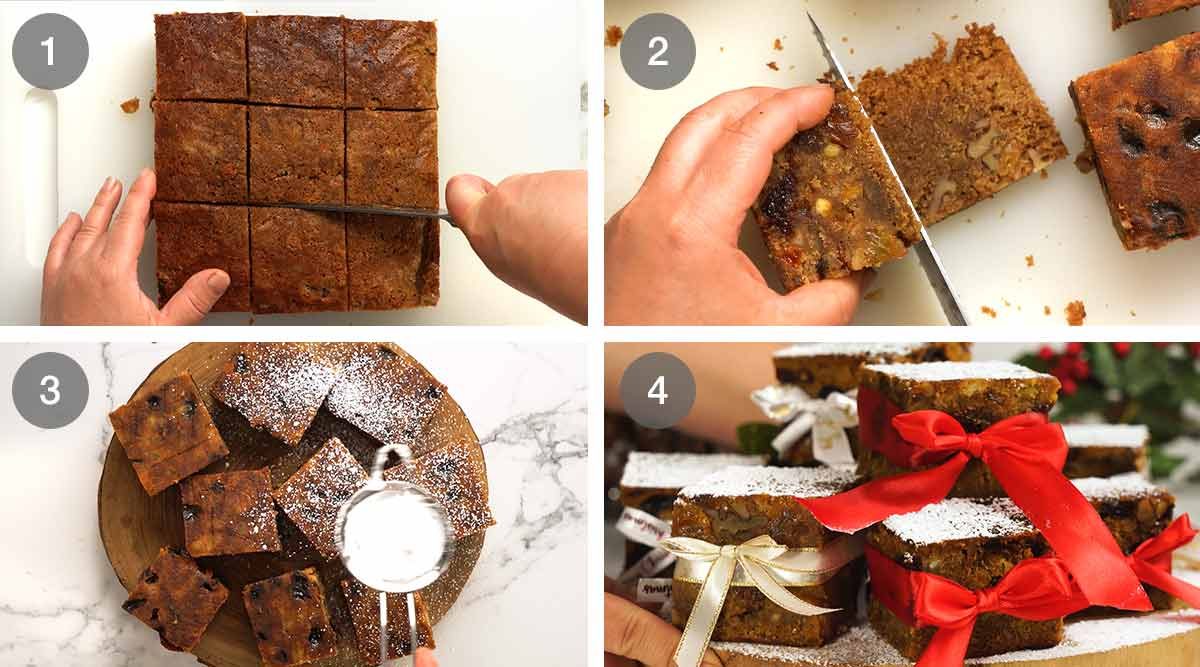
Cutting – Trim the edges (to make the sides neat). Then cut the cake into pieces as desired. I do 9 squares.
-
Trim surface – The surface of the cake is ever so slightly domed. So to make the Christmas Cake into perfect uniform pieces, I trim the surface then turn them upside down and decorate the base.
-
Flip and dust or ice – Flip the cake upside down so the base of the cake is the side you decorate. Then either dust with icing sugar (easy option I use when gift-wrapping), or decorate drippy-style with white frosting (for a classic Christmas Pudding look) or top with fondant (see classic Christmas Cake recipe for directions).
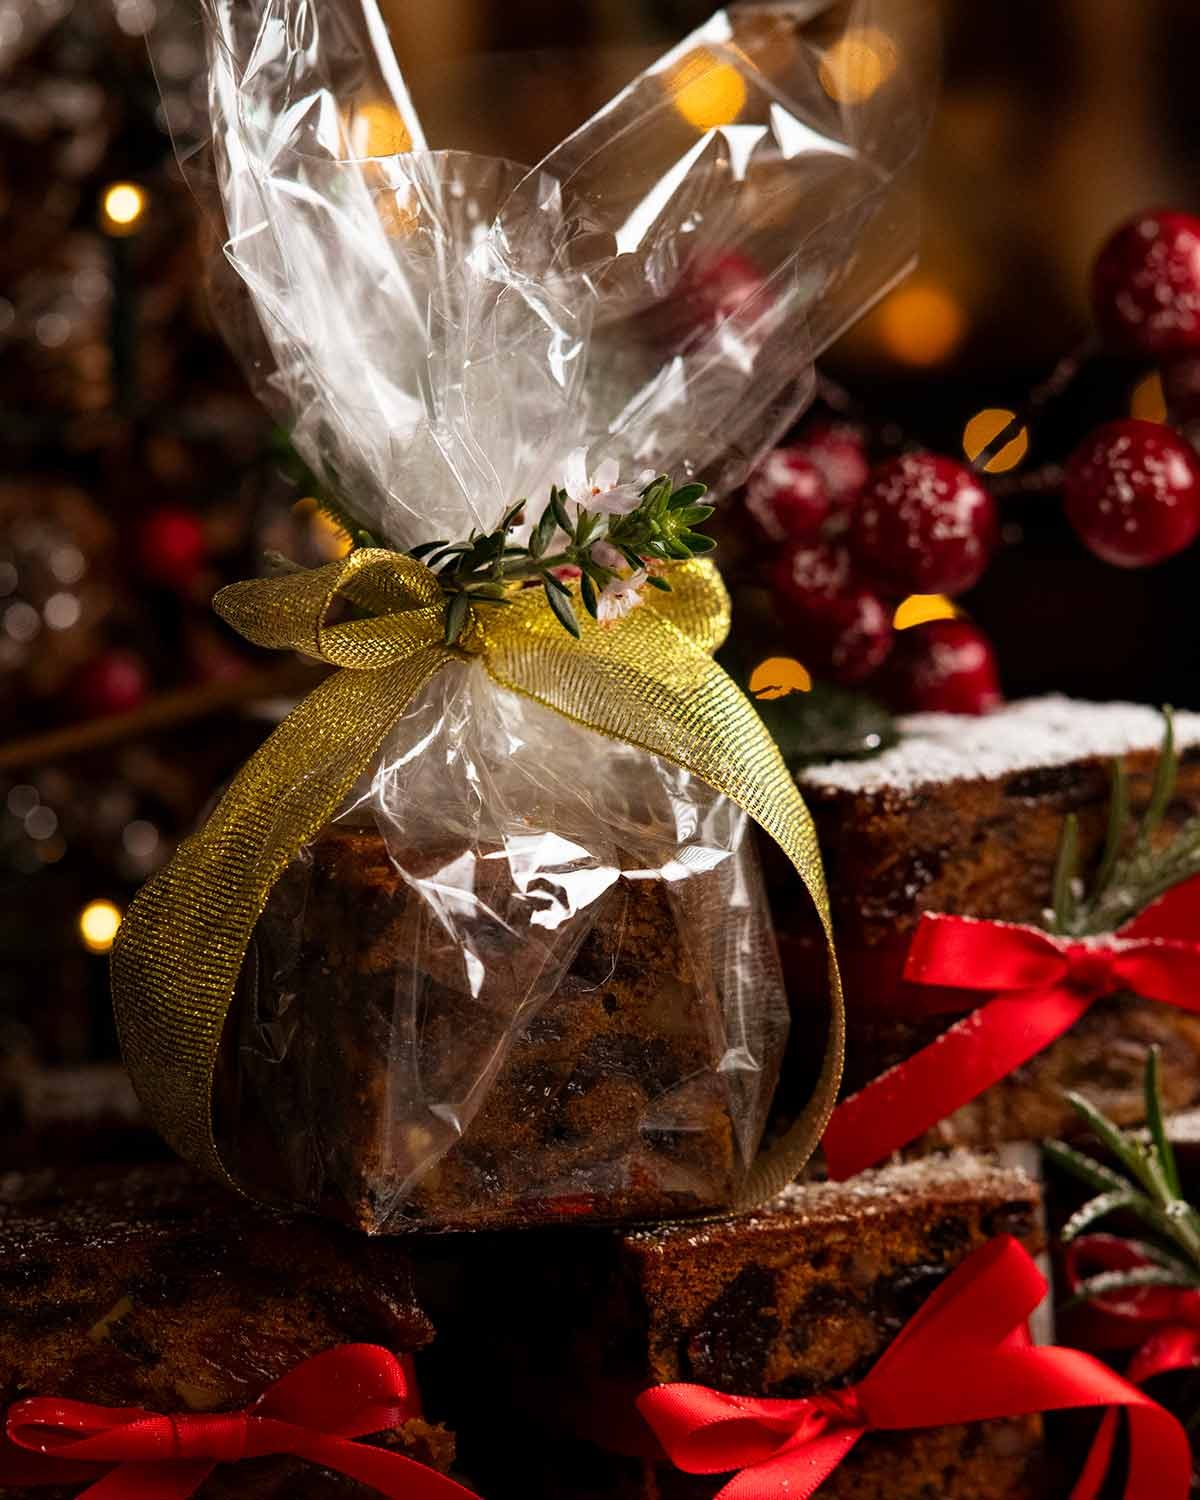
Gift wrapping
As I mentioned earlier, Mini Christmas Cakes have in their favour as a homemade gifting idea. They are:
-
Easy to make
-
Economical – especially if you use a mixed fruit option instead of getting individual dried fruits
-
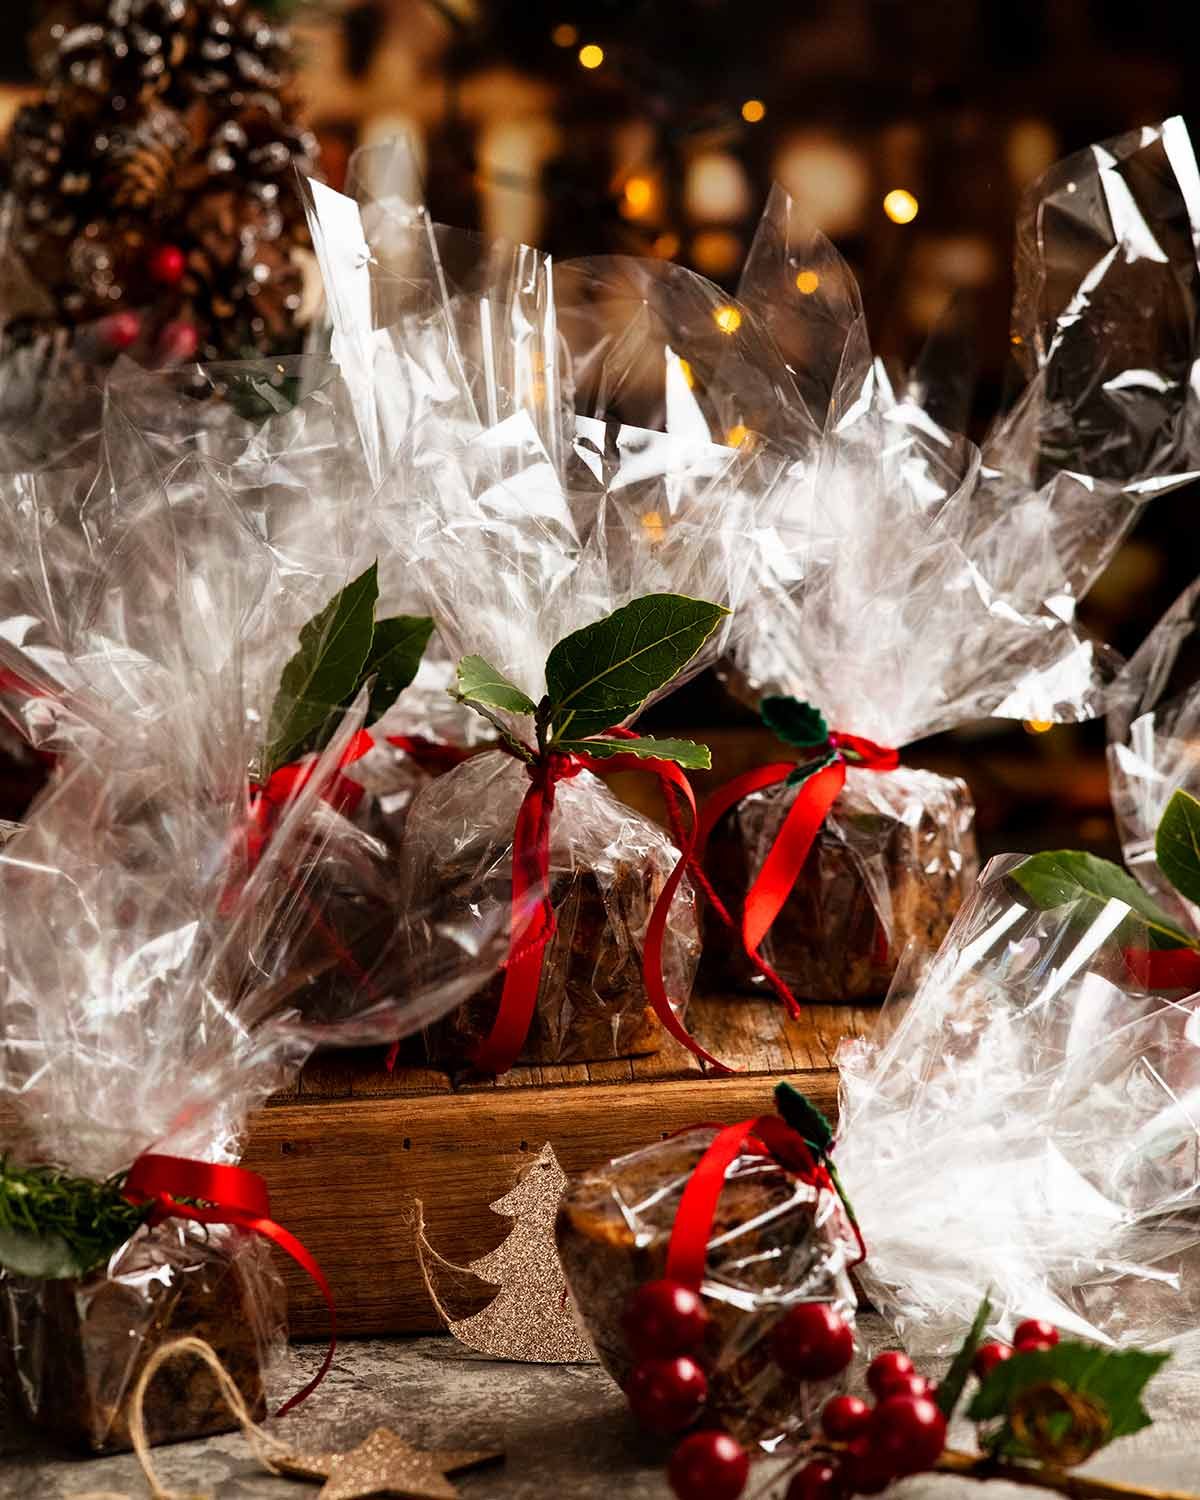
Easy to decorate – Just a dusting of icing sugar makes them instantly Christmassy! Though tying ribbon around the cake really is an easy way to make them even more gift-worthy. 🙂
-
Easy to gift wrap – no need to find specific size jars of gift bags. Just wrap in cellophane and tie with ribbon.
-
Long shelf life – This one is important to me! A few years ago I did cookies but they just don’t have a great shelf life. It’s rare for any cookie to truly remain in top-notch fresh form beyond 2 days. Wheres the Christmas Cake? I’ve kept mine in the fridge for a month and it was still like freshly made. How good is that!
Love to know how you present these Mini Christmas Cakes if you try them, or how you customise the cake to your taste. Share in the comments below – readers love getting inspiration!
Also, spoiler alert for my friends – you’re all getting Mini Christmas Cakes this year. 😂 – Nagi x
Watch how to make it
Hungry for more? Subscribe to my newsletter and follow along on Facebook, Pinterest and Instagram for all of the latest updates.
Mini Christmas Cakes – ideal for gifting!
#wprm-recipe-rating-0 .wprm-rating-star.wprm-rating-star-full svg * { fill: #343434; }#wprm-recipe-rating-0 .wprm-rating-star.wprm-rating-star-33 svg * { fill: url(#wprm-recipe-rating-0-33); }#wprm-recipe-rating-0 .wprm-rating-star.wprm-rating-star-50 svg * { fill: url(#wprm-recipe-rating-0-50); }#wprm-recipe-rating-0 .wprm-rating-star.wprm-rating-star-66 svg * { fill: url(#wprm-recipe-rating-0-66); }linearGradient#wprm-recipe-rating-0-33 stop { stop-color: #343434; }linearGradient#wprm-recipe-rating-0-50 stop { stop-color: #343434; }linearGradient#wprm-recipe-rating-0-66 stop { stop-color: #343434; }
Ingredients
Fast soaked fruit (Note 1):
- 300g / 10 ozraisins
- 150g / 5 ozdiced dried apricots, chopped 8 mm / 1/3″
- 75g / 2 1/2 ozmixed peel, diced 5mm / 1/5
- 150g / 5 ozglace cherries, chopped 8 mm / 1/3″
- 180g / 6 ozdates, diced 5mm / 1/5″
- 1 cup + 2 tbspapple juice , OR 1/3 brandy + 2/3 juice (Note 2)
Cake:
- 115g / 8 tbspunsalted butter, softened (1 US stick)
- 1 1/2cupsbrown sugar, packed (or dark brown sugar for a darker crumb, Note 3)
- 1/2cupvegetable oil(or canola, peanut, grapeseed)
- 3tbspmolasses or golden syrup(Note 4)
- 1/2tspsalt
- 1/2tspall spice
- 1/2tspcinnamon
- 1/2tspnutmeg
- 3eggs
- 1/2tspbaking powder
- 1 2/3cupsplain flour(all purpose flour)
- 3/4cupwalnuts, chopped (optional)
Decorating
- Icing sugar, for dusting
- Christmas fondant – see directions here
Christmas Pudding Drippy Glaze
- 1 1/2cupssoft icing sugar / powdered sugar
- 1 tbsp / 15gunsalted butter, softened
- 1/2tspvanilla
- 1 1/2 – 3tbspmilk
Instructions
Fast Soaked Fruit:
-
Heat – Place dried fruit and juice/brandy in a large microwavable container. Microwave 1 1/2 minutes on high or until hot.
-
Soak – Stir to coat all fruit in liquid. Cover then set aside for 1 hour (to plump up/soak and cool).
Cake:
-
Preheat oven to 160°C / 320°F (140°C fan). Grease and line a 20cm / 8″ square cake pan with baking paper / parchment paper, or larger pan to get more cakes out of it. (Note 5 on pan size).
-
Beating – Using an electric beater, beat butter and sugar until smooth and creamy (about 1 minute on speed 5). Add oil and molasses, beat until combined. Add salt, spices and baking powder – beat until incorporated. Add eggs, one at a time, beating until just incorporated.
-
Stir in the flour with a wooden spoon, then the dried fruit (including all the extra liquid in bowl) and walnuts (if using).
-
Pour into the cake pan, it will fill it right to the top (it won’t spill over, the cake barely rises). Cover the surface with paper then cover with foil.
-
Bake 2 1/2 hours – Bake for 2 hours, remove the foil and paper, then bake for a further 30 minutes. A skewer inserted into middle should come out clean with no batter on it.
-
Remove from oven and cool for 20 minutes before transferring to cooling rack. Cool completely before cutting.
-
Cutting – Trim off the sides (to make them neat). Then cut into 9 squares (or more, if you want). Trim the surface (to make them level as the cake slightly domes). Then flip upside down and decorate the base of the cake.
Decorating, gifting and serving
-
Simple – Dust with icing sugar. That’s all this cake needs, it’s so full flavoured and moist! Wrap with cellophane and ribbon to gift.
-
Ribbon – Wrap and tie a ribbon around each cake. Nice way to present for serving. (Optional to include for gift wrapping too, but then there’s a double ribbon situation happening – ie ribbon and cake, ribbon on cellophane!)
-
Drippy white glaze – Mix the icing sugar, butter, vanilla and start with 2 tbsp milk. Mix really well (it will take time to come together, be patient). Then adjust thickness using 1/2 tsp milk at a time. BE CAREFUL – it goes from too thick to too thin very easily! Goal: Thick glaze that will ooze “pudding style”, as pictured, rather than dripping in long streaks. Spoon onto cake, coaxing it down the sides. Allow to set before wrapping.
-
Fondant – See directions in my classic round Christmas Cake.
-
Serving – serve with custard for a traditional experience! Either homemade custard or store bought pouring custard.
Recipe Notes:
Nutrition Information:
Life of Dozer
Pleading for help.

